Table of Contents
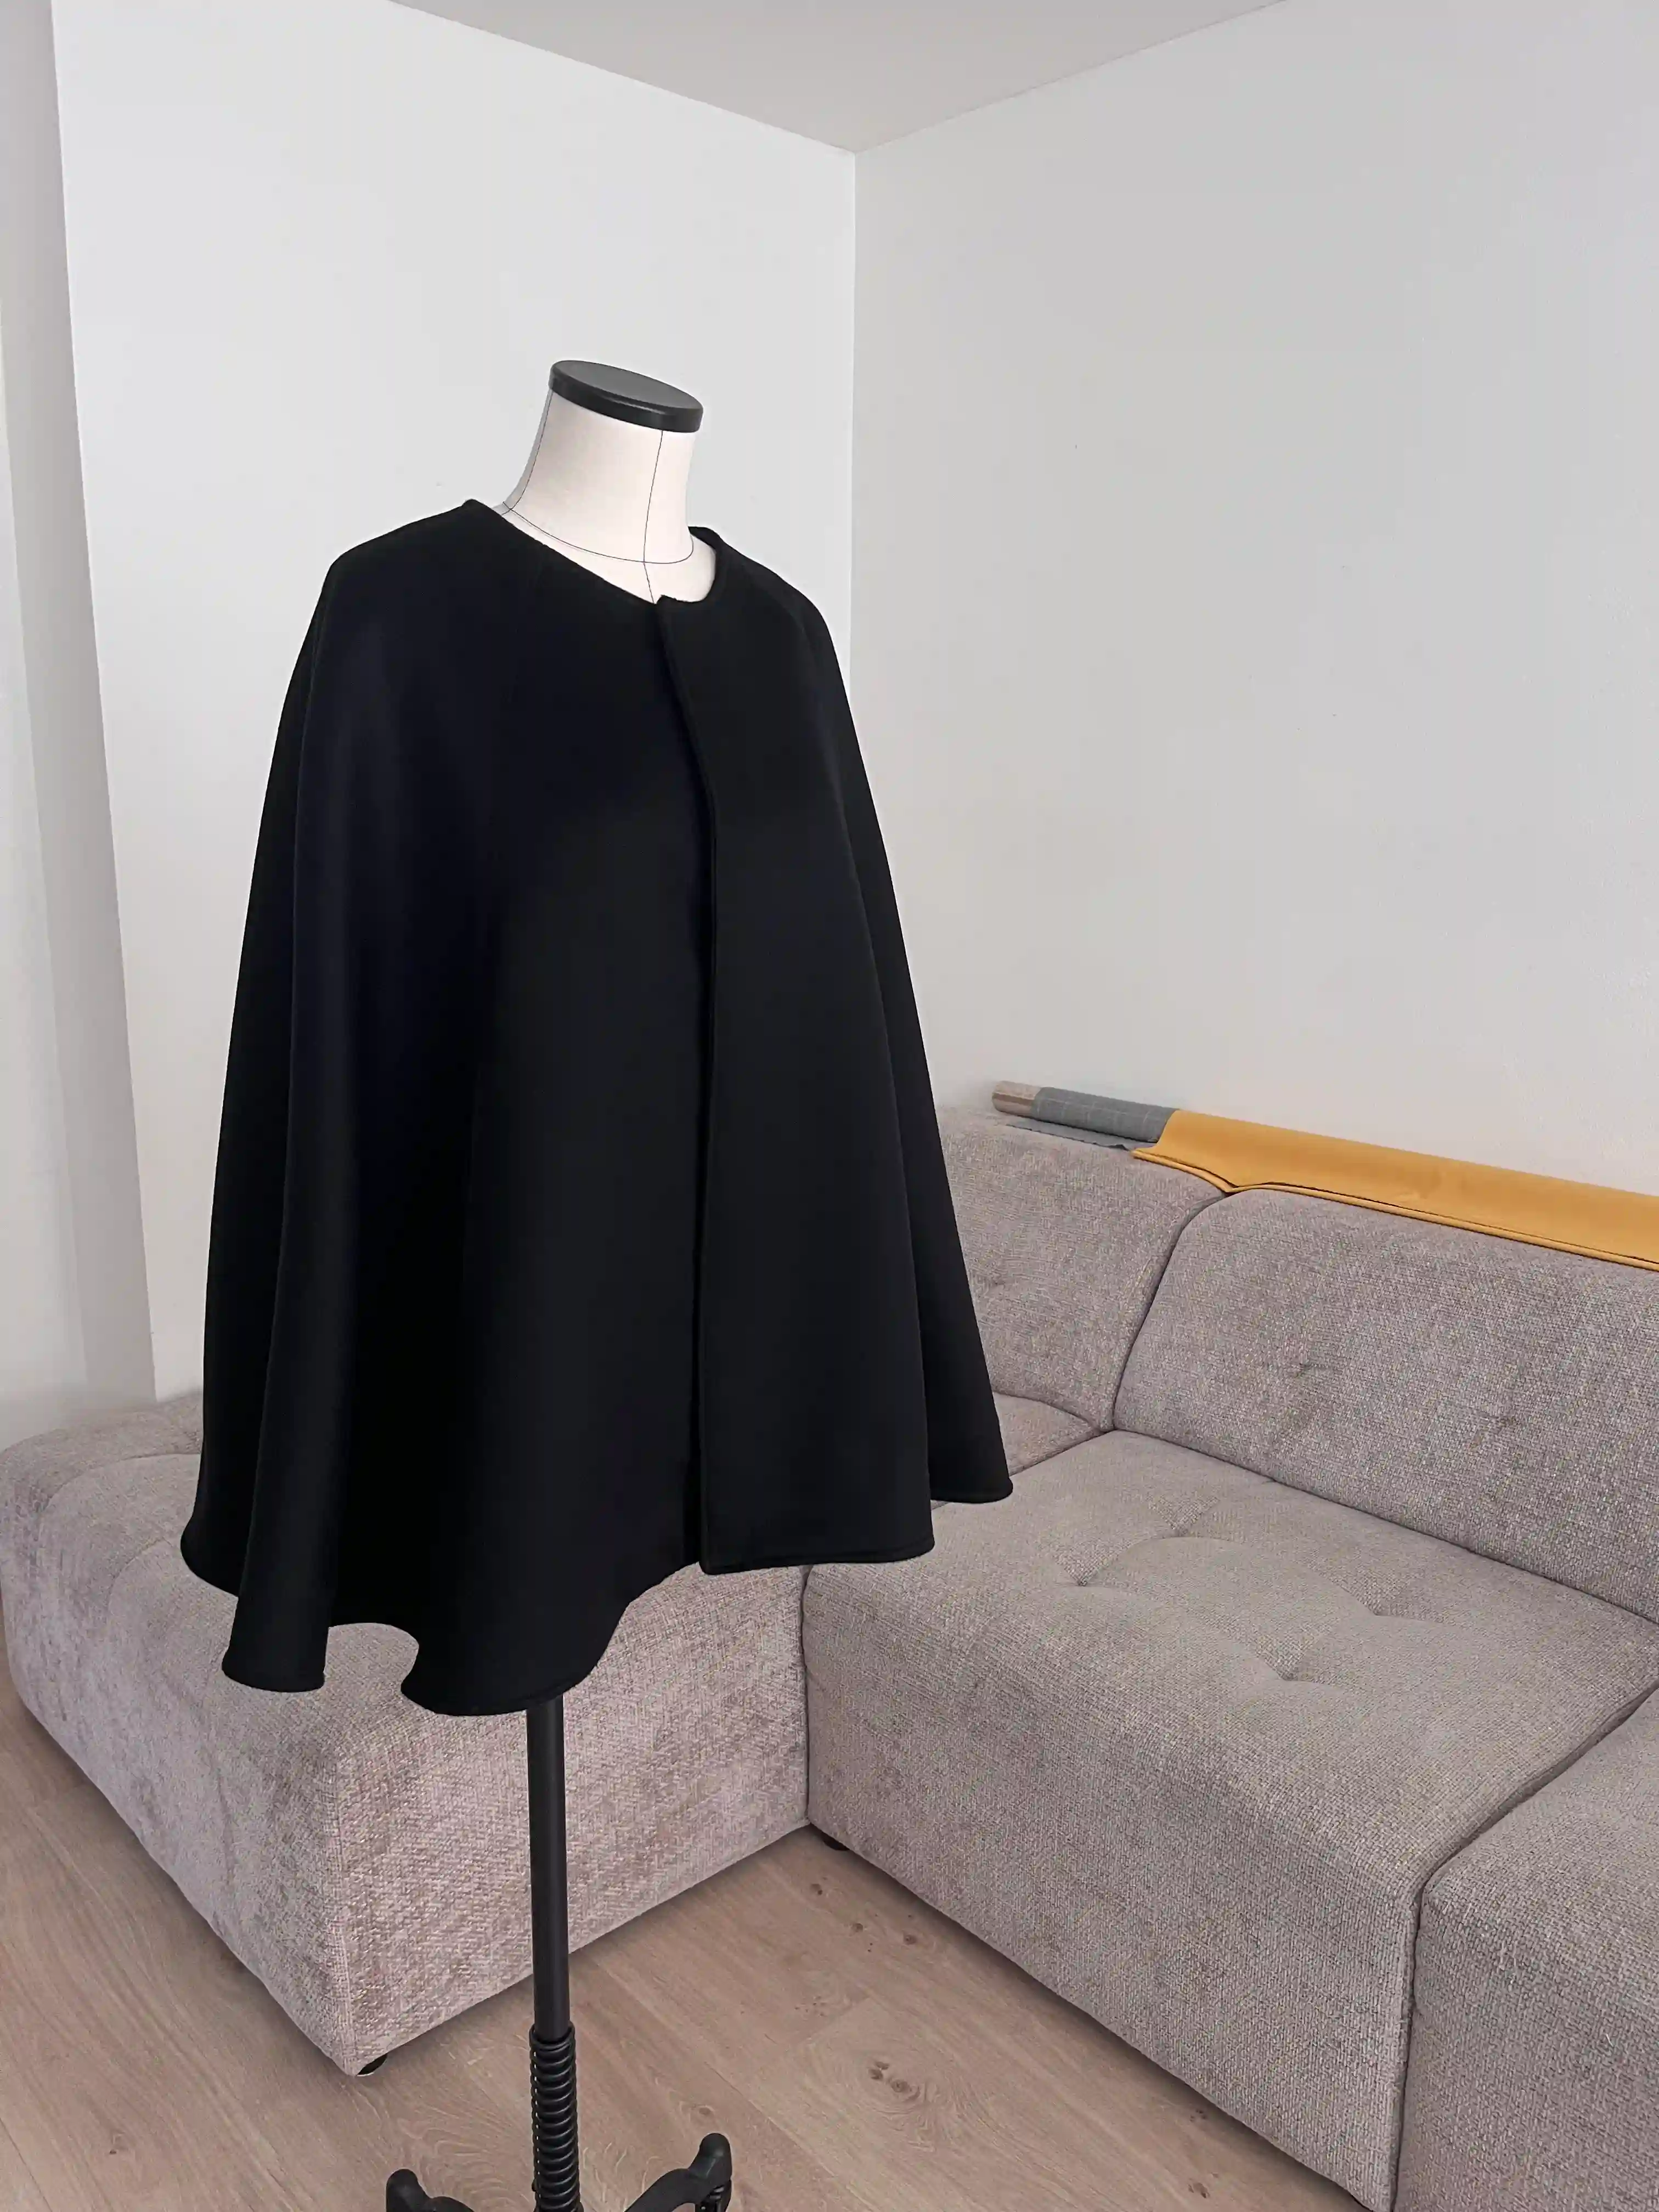
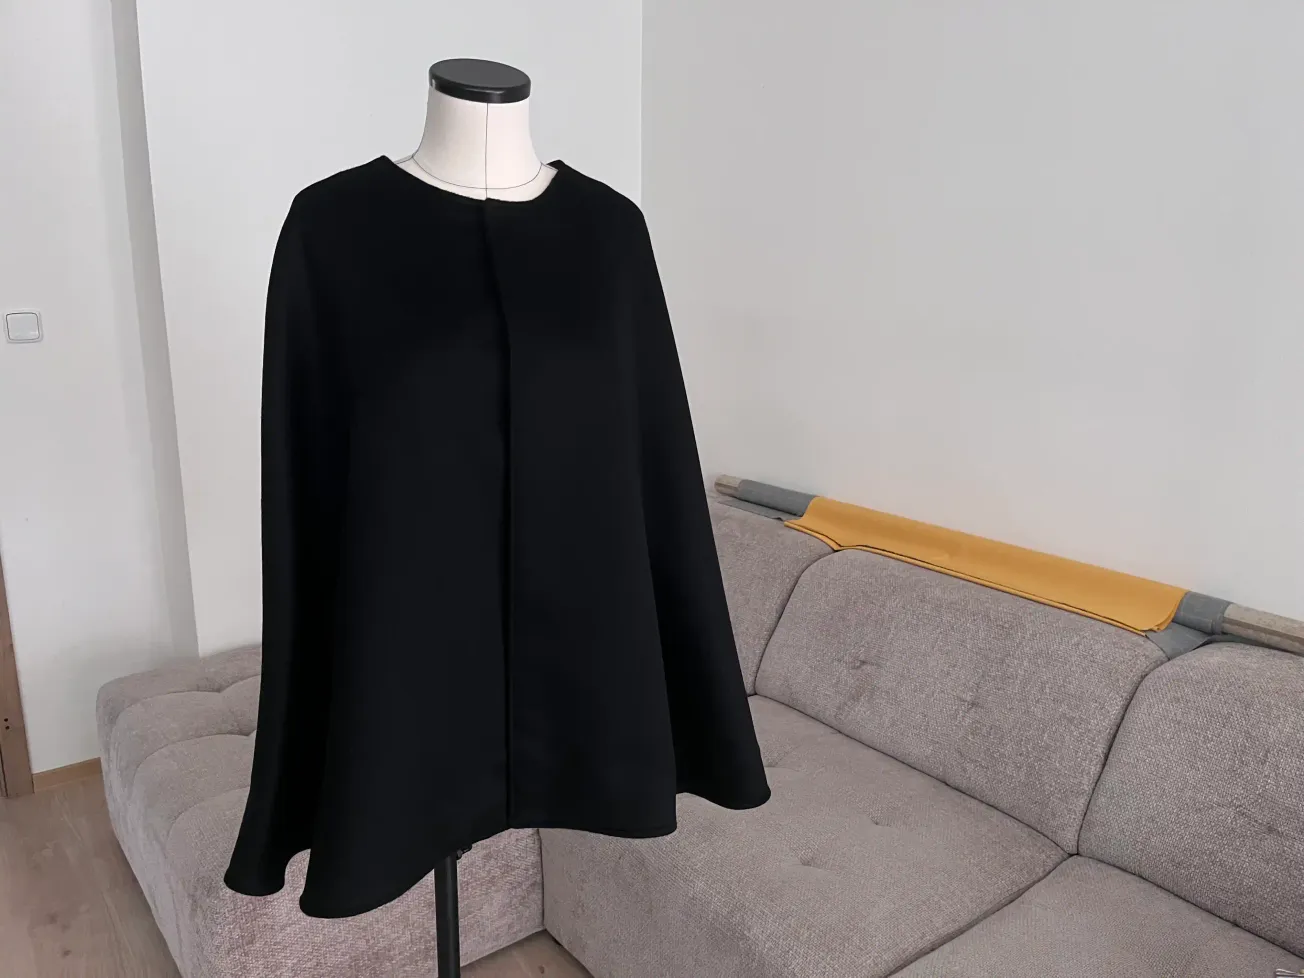
It has always been my dream to sew my own cape or coat for gloomy autumn weather, to pick up my tailoring shears and, for the first time, hear that wonderful sound as the blades meet the cashmere fabric that would soon become my first cape. I couldn't wait to light my favorite candle, put on a Spotify playlist, and slip into "my own quiet world." It turned out beautifully, just as the rain began to fall outside.
I recently wrote about what it’s like to work with Loro Piana cashmere.
In this article, I’ll show you how I made the cape so that you can create one of your own. I’ll also share a video tutorial and a practical sewing pattern, which, like my other patterns, you can download for free.
When deciding between a coat and a cape, I chose the cape; it has no sleeves, and the pieces are relatively simple to assemble, well within the reach of an advanced beginner. You don’t need extensive sewing experience to craft a cape from, say, Loro Piana cashmere, a material that sits at the very pinnacle of the global fashion world.
Of course, you could opt for a coat made from standard polyester, but remember that plastic won’t keep you warm in cold, windy weather. Also, mistakes tend to show up more on cheap materials than on high-quality ones. I was pleasantly surprised by how wonderful it was to work with cashmere from this particular fashion house. It was truly like a fairy tale.
So, if you’re still thinking about whether your skills are up to the task, listen: I didn't use zippers or buttons for this cape. It is easy and elegant, a design choice I made to prove that anyone can work with this material. This elegant minimalism lets the fabric shine, elevating the entire piece. See for yourself.
Why a Cape is the Best Project for Luxury Cashmere
I chose this minimalist cape because it's a timeless design; it will still be in style ten years from now, or even longer. Also, the cashmere's beautiful drape and subtle sheen lend a wonderful, feminine quality to the piece. That was what I loved most about the fabric: its scent, its luster, and the way it feels to the touch. To be honest, the idea of sewing a coat, given its complex construction, felt a bit daunting. I think it’s better to take things step by step rather than jump straight into a more demanding project like a coat. Coats are the ultimate challenge; a cape is a great stepping stone, and it is far more beginner-friendly to construct.
Tools & Materials Needed for Sewing a Cashmere Cape
Fabric for the cape (cashmere or other coat-weight fabric)
Matching thread
Bias binding tape (I chose a satin finish in "night sky blue")
Sewing machine
Tailor's chalk
Pins (or clips)
Measuring tape
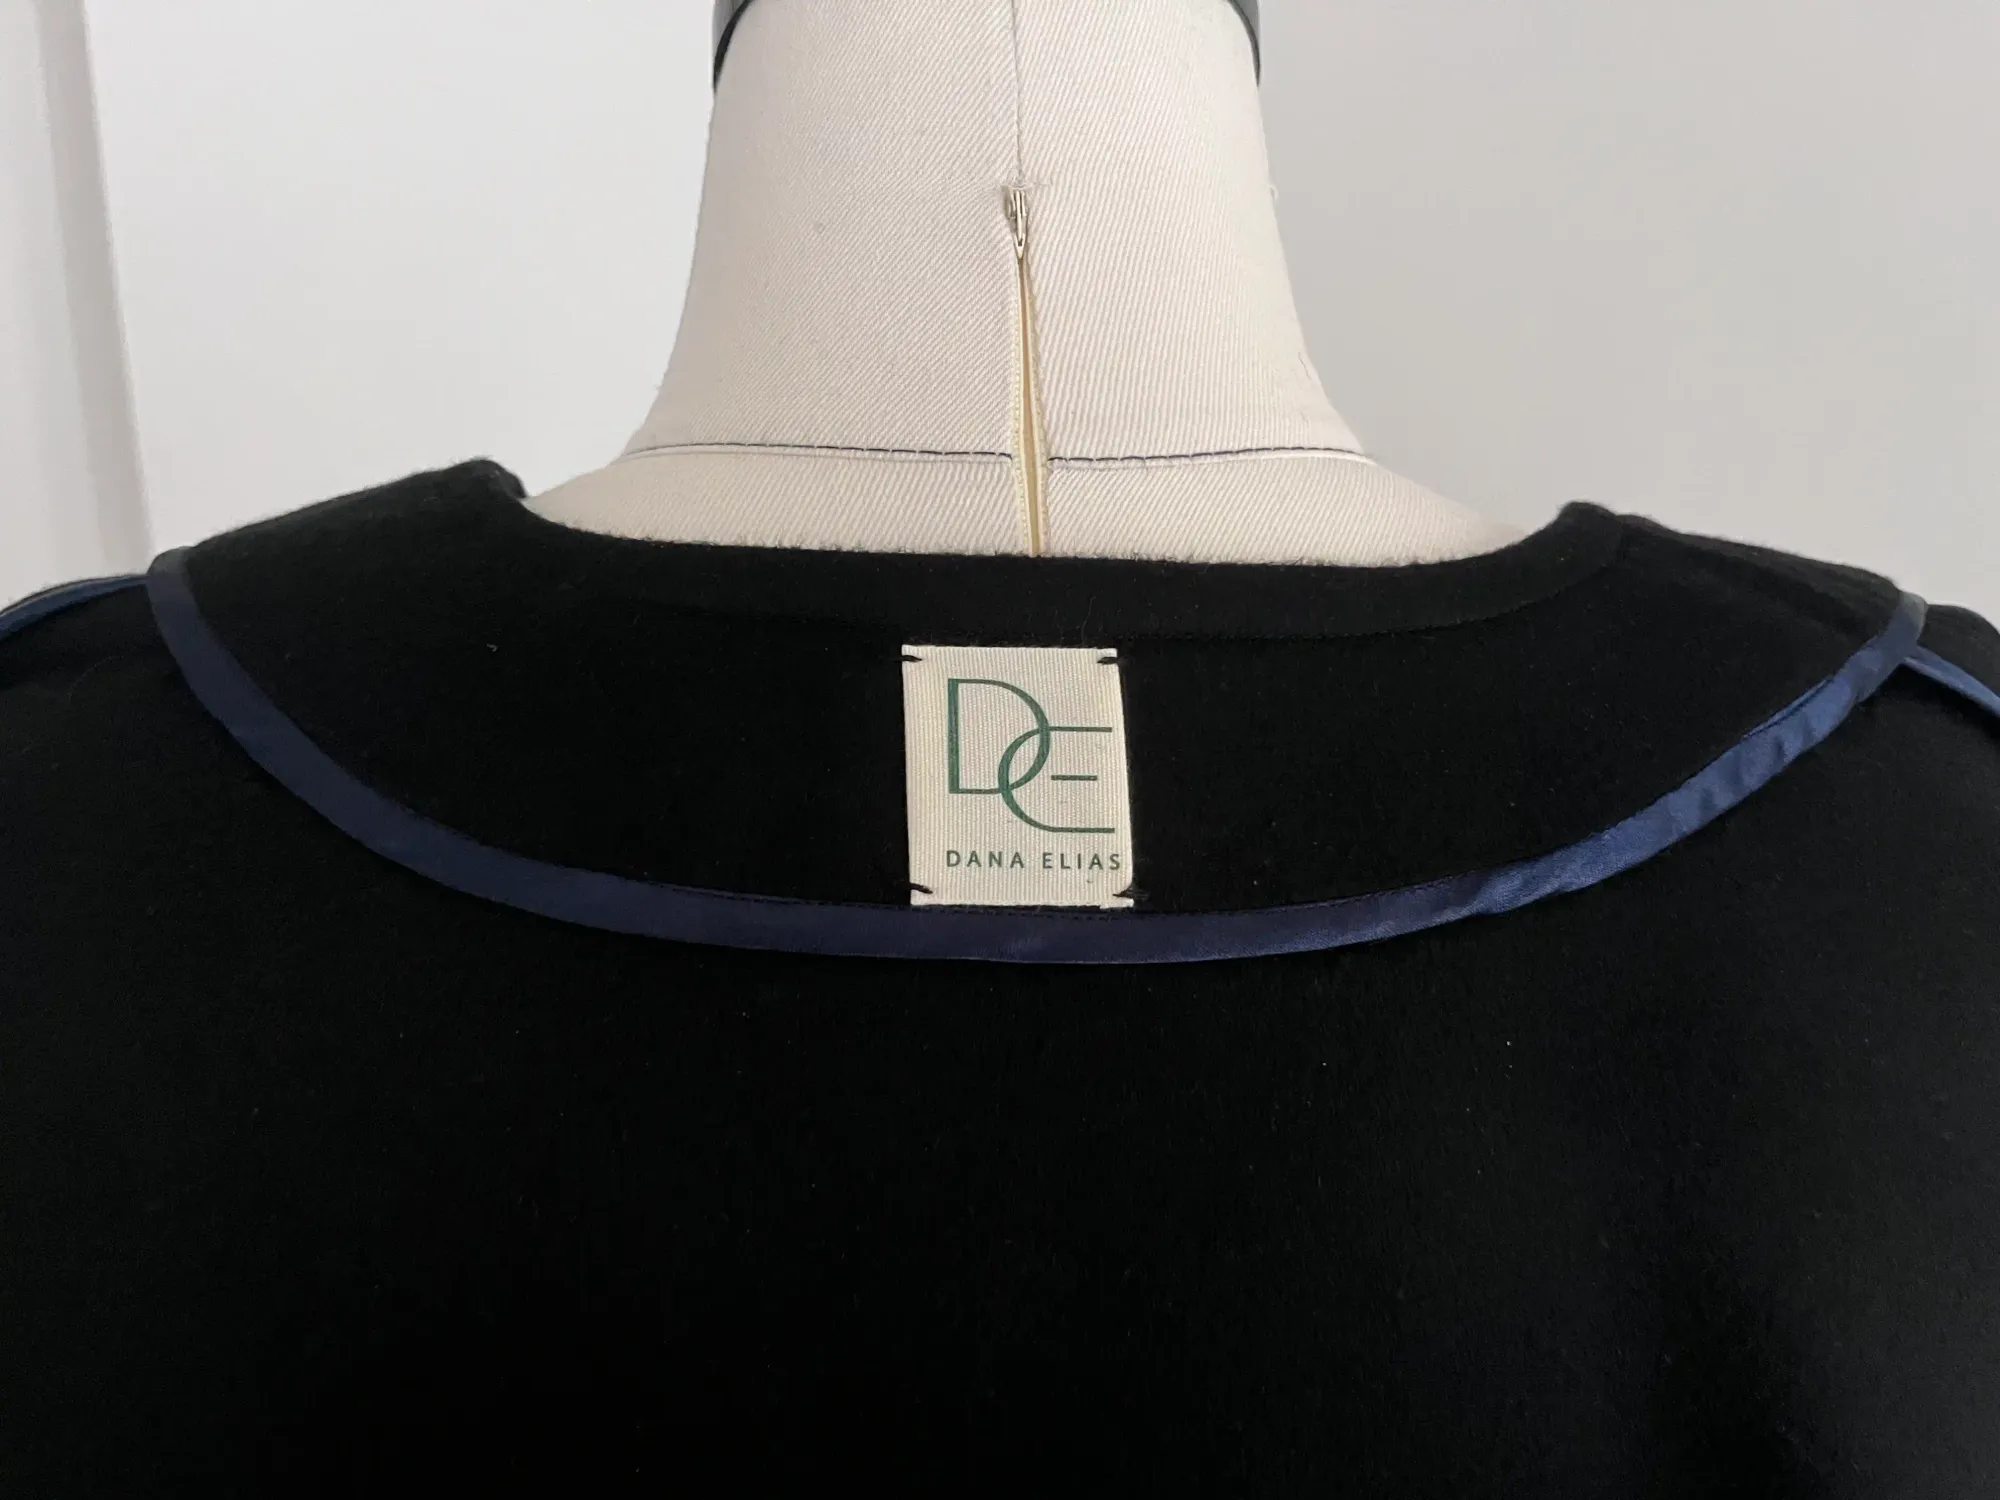
Estimated Time
Approximately 3,5 days of work
YouTube Tutorial
Watch Sewing Cashmere Cape Tutorial
How much fabric do you need for this project?
Main Fabric
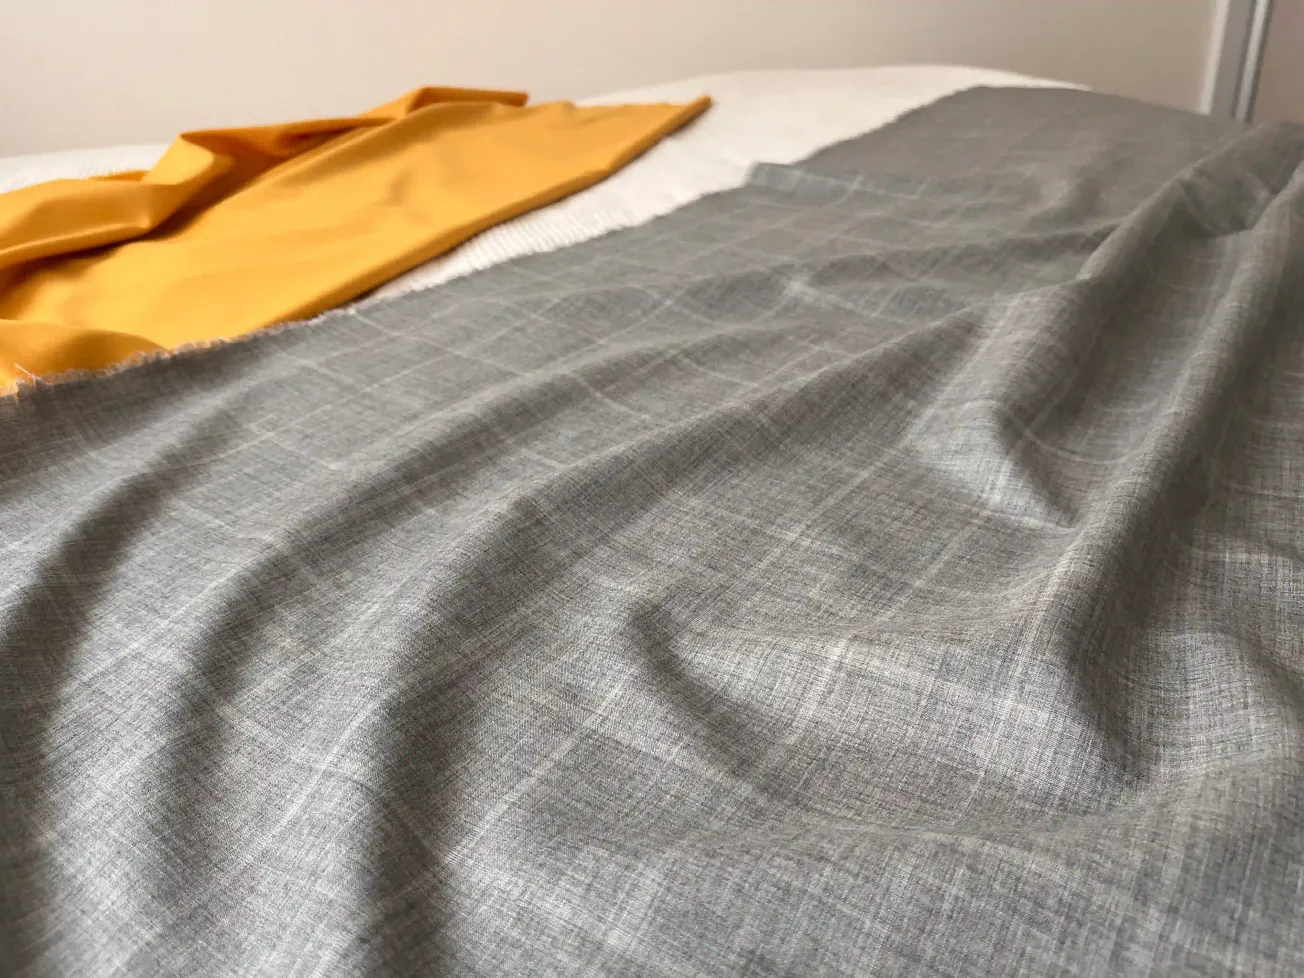
To make this cape, I needed 2.5 meters of fabric, 1.55 meters wide. I got very lucky; I snagged the last two pieces on sale: one was a 0.8-meter store sample, and the other was a 1.7-meter remnant. Even though I bought them as two separate discounted pieces, the cape pattern fit perfectly on both.
Lining
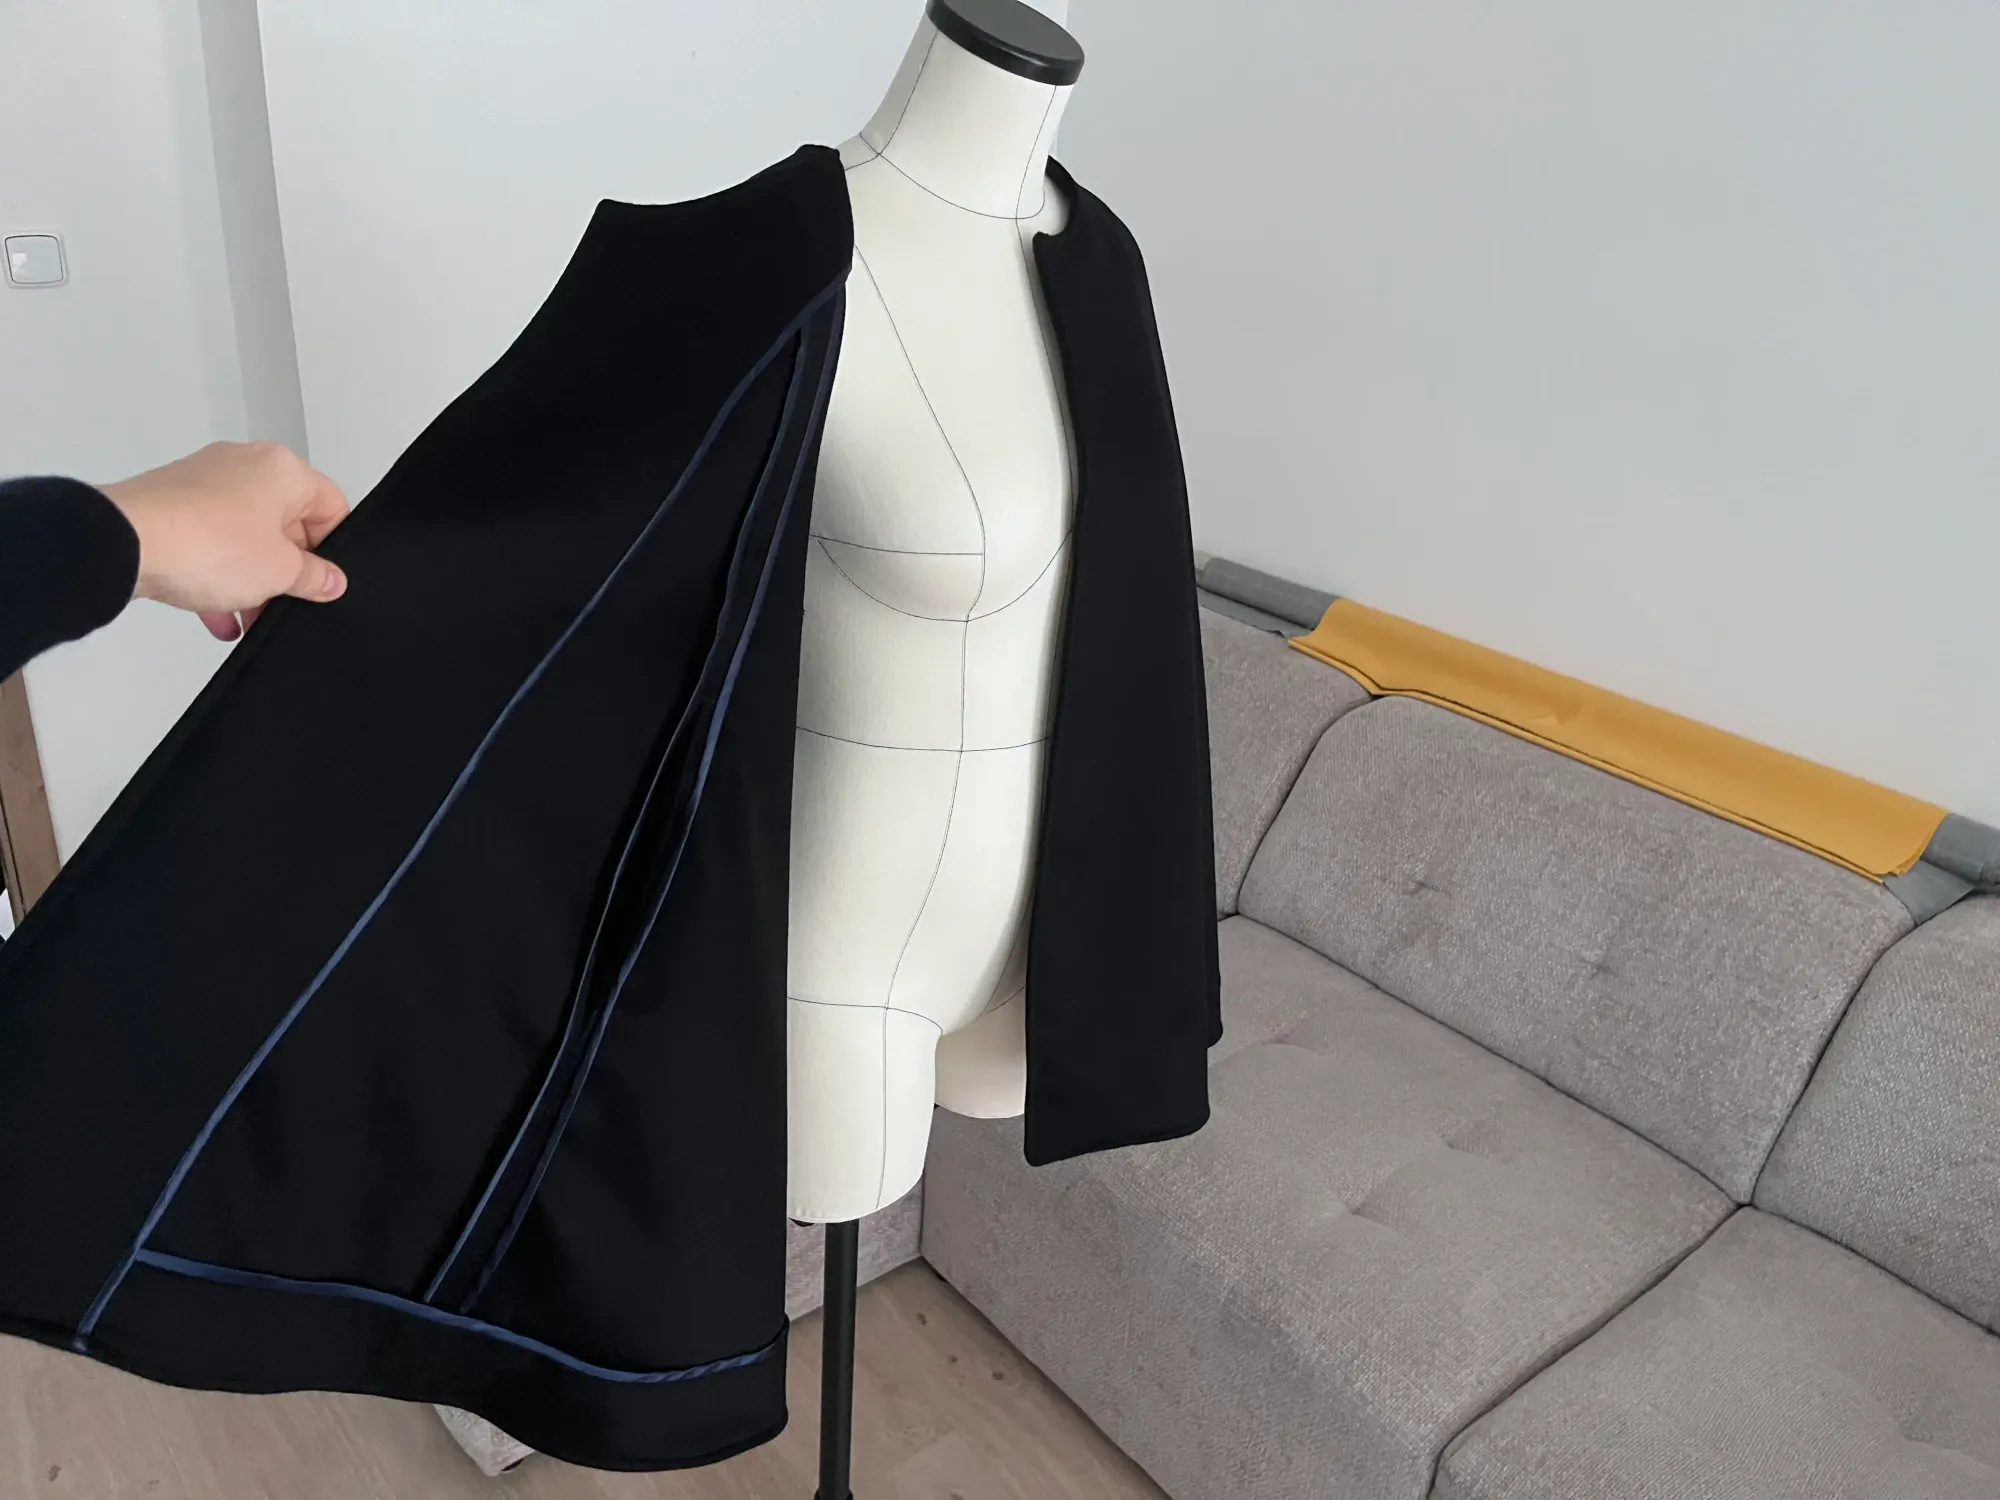
The cape could have been lined; a silk lining would have been an ideal choice for such a luxurious material. However, I opted for an unlined version because I wanted to try out a "Hong Kong seam" (finishing seams with binding). I had seen a few videos about this on social media and wanted to give it a go. The cape is sufficiently sturdy and warm even without a lining. Furthermore, the elegant Hong Kong seam adds a touch of feminine sophistication; it was simply a perfect match.
Bias Binding
You can make this bias binding tape yourself at home, but I chose a pre-made version to save time and myself the trouble. I bought 7,5 meters it in a "night sky" (deep blue/navy) shade. It would have looked just as lovely in chocolate brown, black, or even a soft baby pink. I think a delicate champagne shade would also look beautiful on this cape.
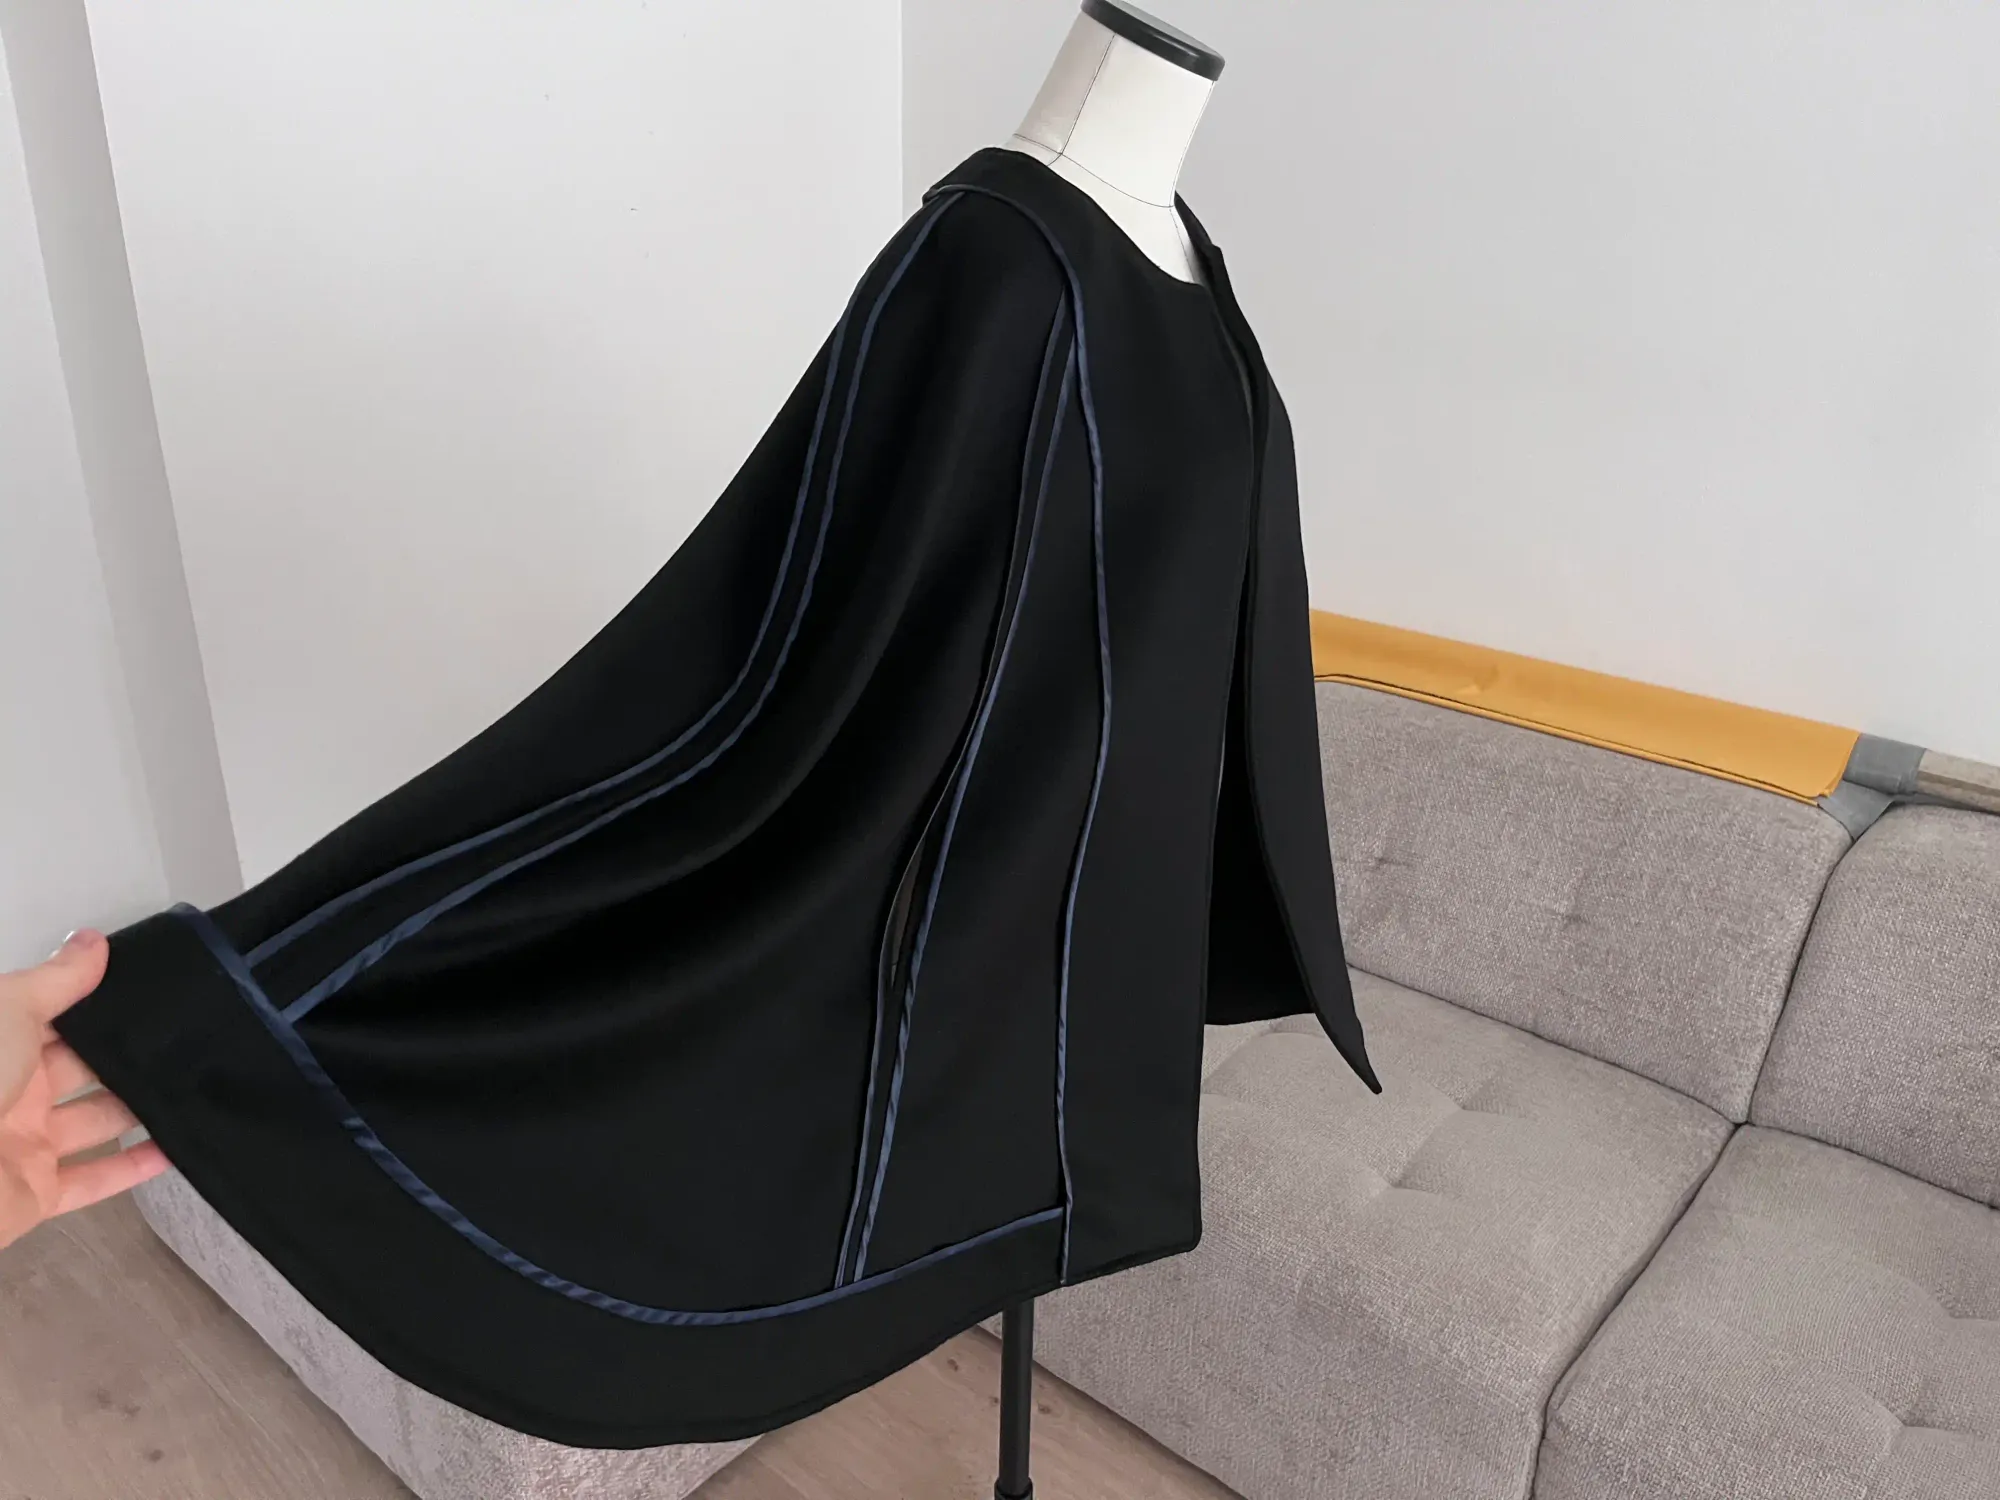
Free Cape Pattern
Download the free cape pattern ( EU size M/L, A4 print format).
Things to watch out for
This was my first time sewing with such a high-quality fabric. I did some research on how to handle it; I applied what I learned and discovered a few things later, so I’ll know for next time. I’m sharing these tips with you now so you don’t have to search for them yourself or end up regretting anything.
Cutting the fabric
I had the fabric folded while cutting. I later realized that was a mistake. Fortunately, I weighed down the fabric with small plates to keep it from shifting; however, I later discovered that cashmere, due to its delicate nature, tends to slip slightly while being cut. Next time I work with a similar fabric, I will lay it flat and cut without folding, ensuring both pieces are identical.
As it turned out, both pieces were identical, but had I not weighed the fabric down, I would have been taking quite a risk.
Paying attention to the nap (grain/direction)
This is crucial, so please take note. Cashmere has a distinct nap; you can see it in its texture and sheen. Lay out all pattern pieces in the same direction; this is essential for maintaining a consistent luster. If you don't respect the nap, areas with different directions will reflect light differently, making the garment appear to have varying shades in daylight. I included arrows on the pattern to indicate the correct orientation for placing each cape piece on the fabric, ensuring the cape is constructed properly.
Marking
In hindsight, I realized that using traditional tailor’s tacks (thread marking) would have been the ideal approach. I was perhaps a bit too rough with the fabric when I marked it with pink tailor’s chalk. In fact, just before finishing, I had to gently wipe away the chalk from certain spots. I will definitely use tailor’s tacks next time.
How to Sew a Cashmere Cape: Step-by-Step Tutorial
Follow the steps one by one as you sew the coat. If you need any advice, leave a comment below; I’ll be happy to help and provide any additional information you might need.
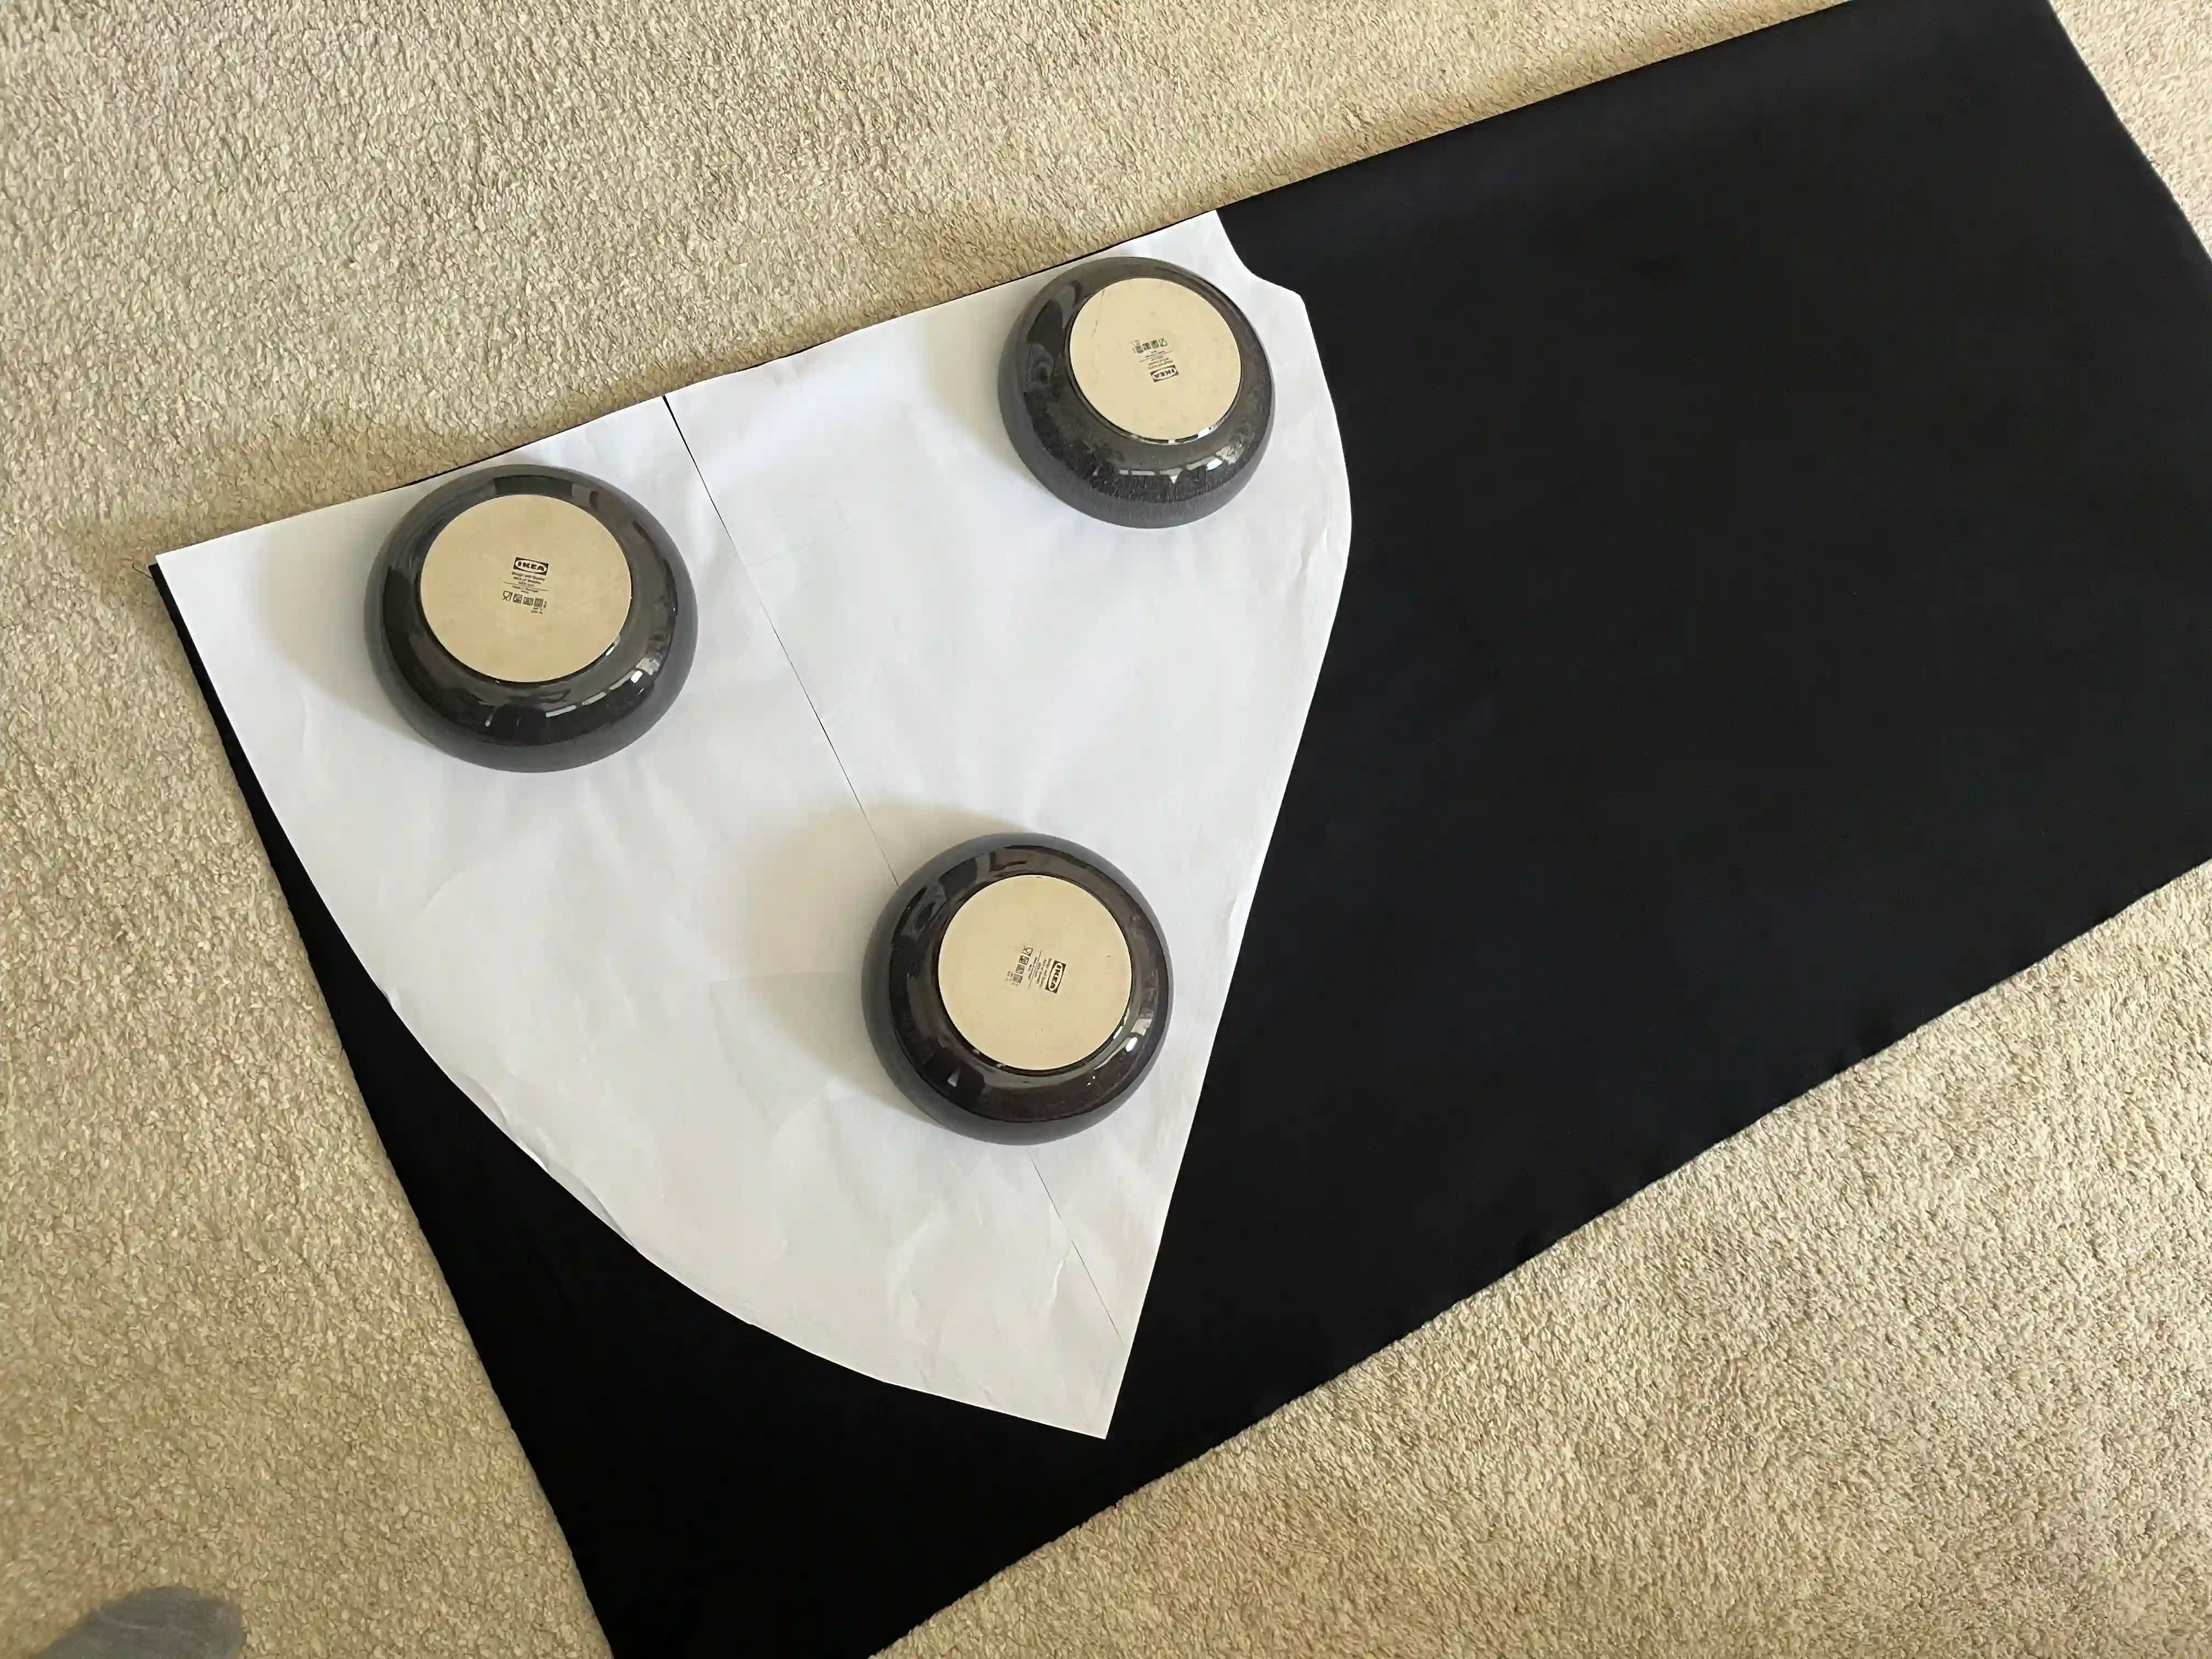
Place the pattern on the fabric so that it aligns with the direction of the nap.
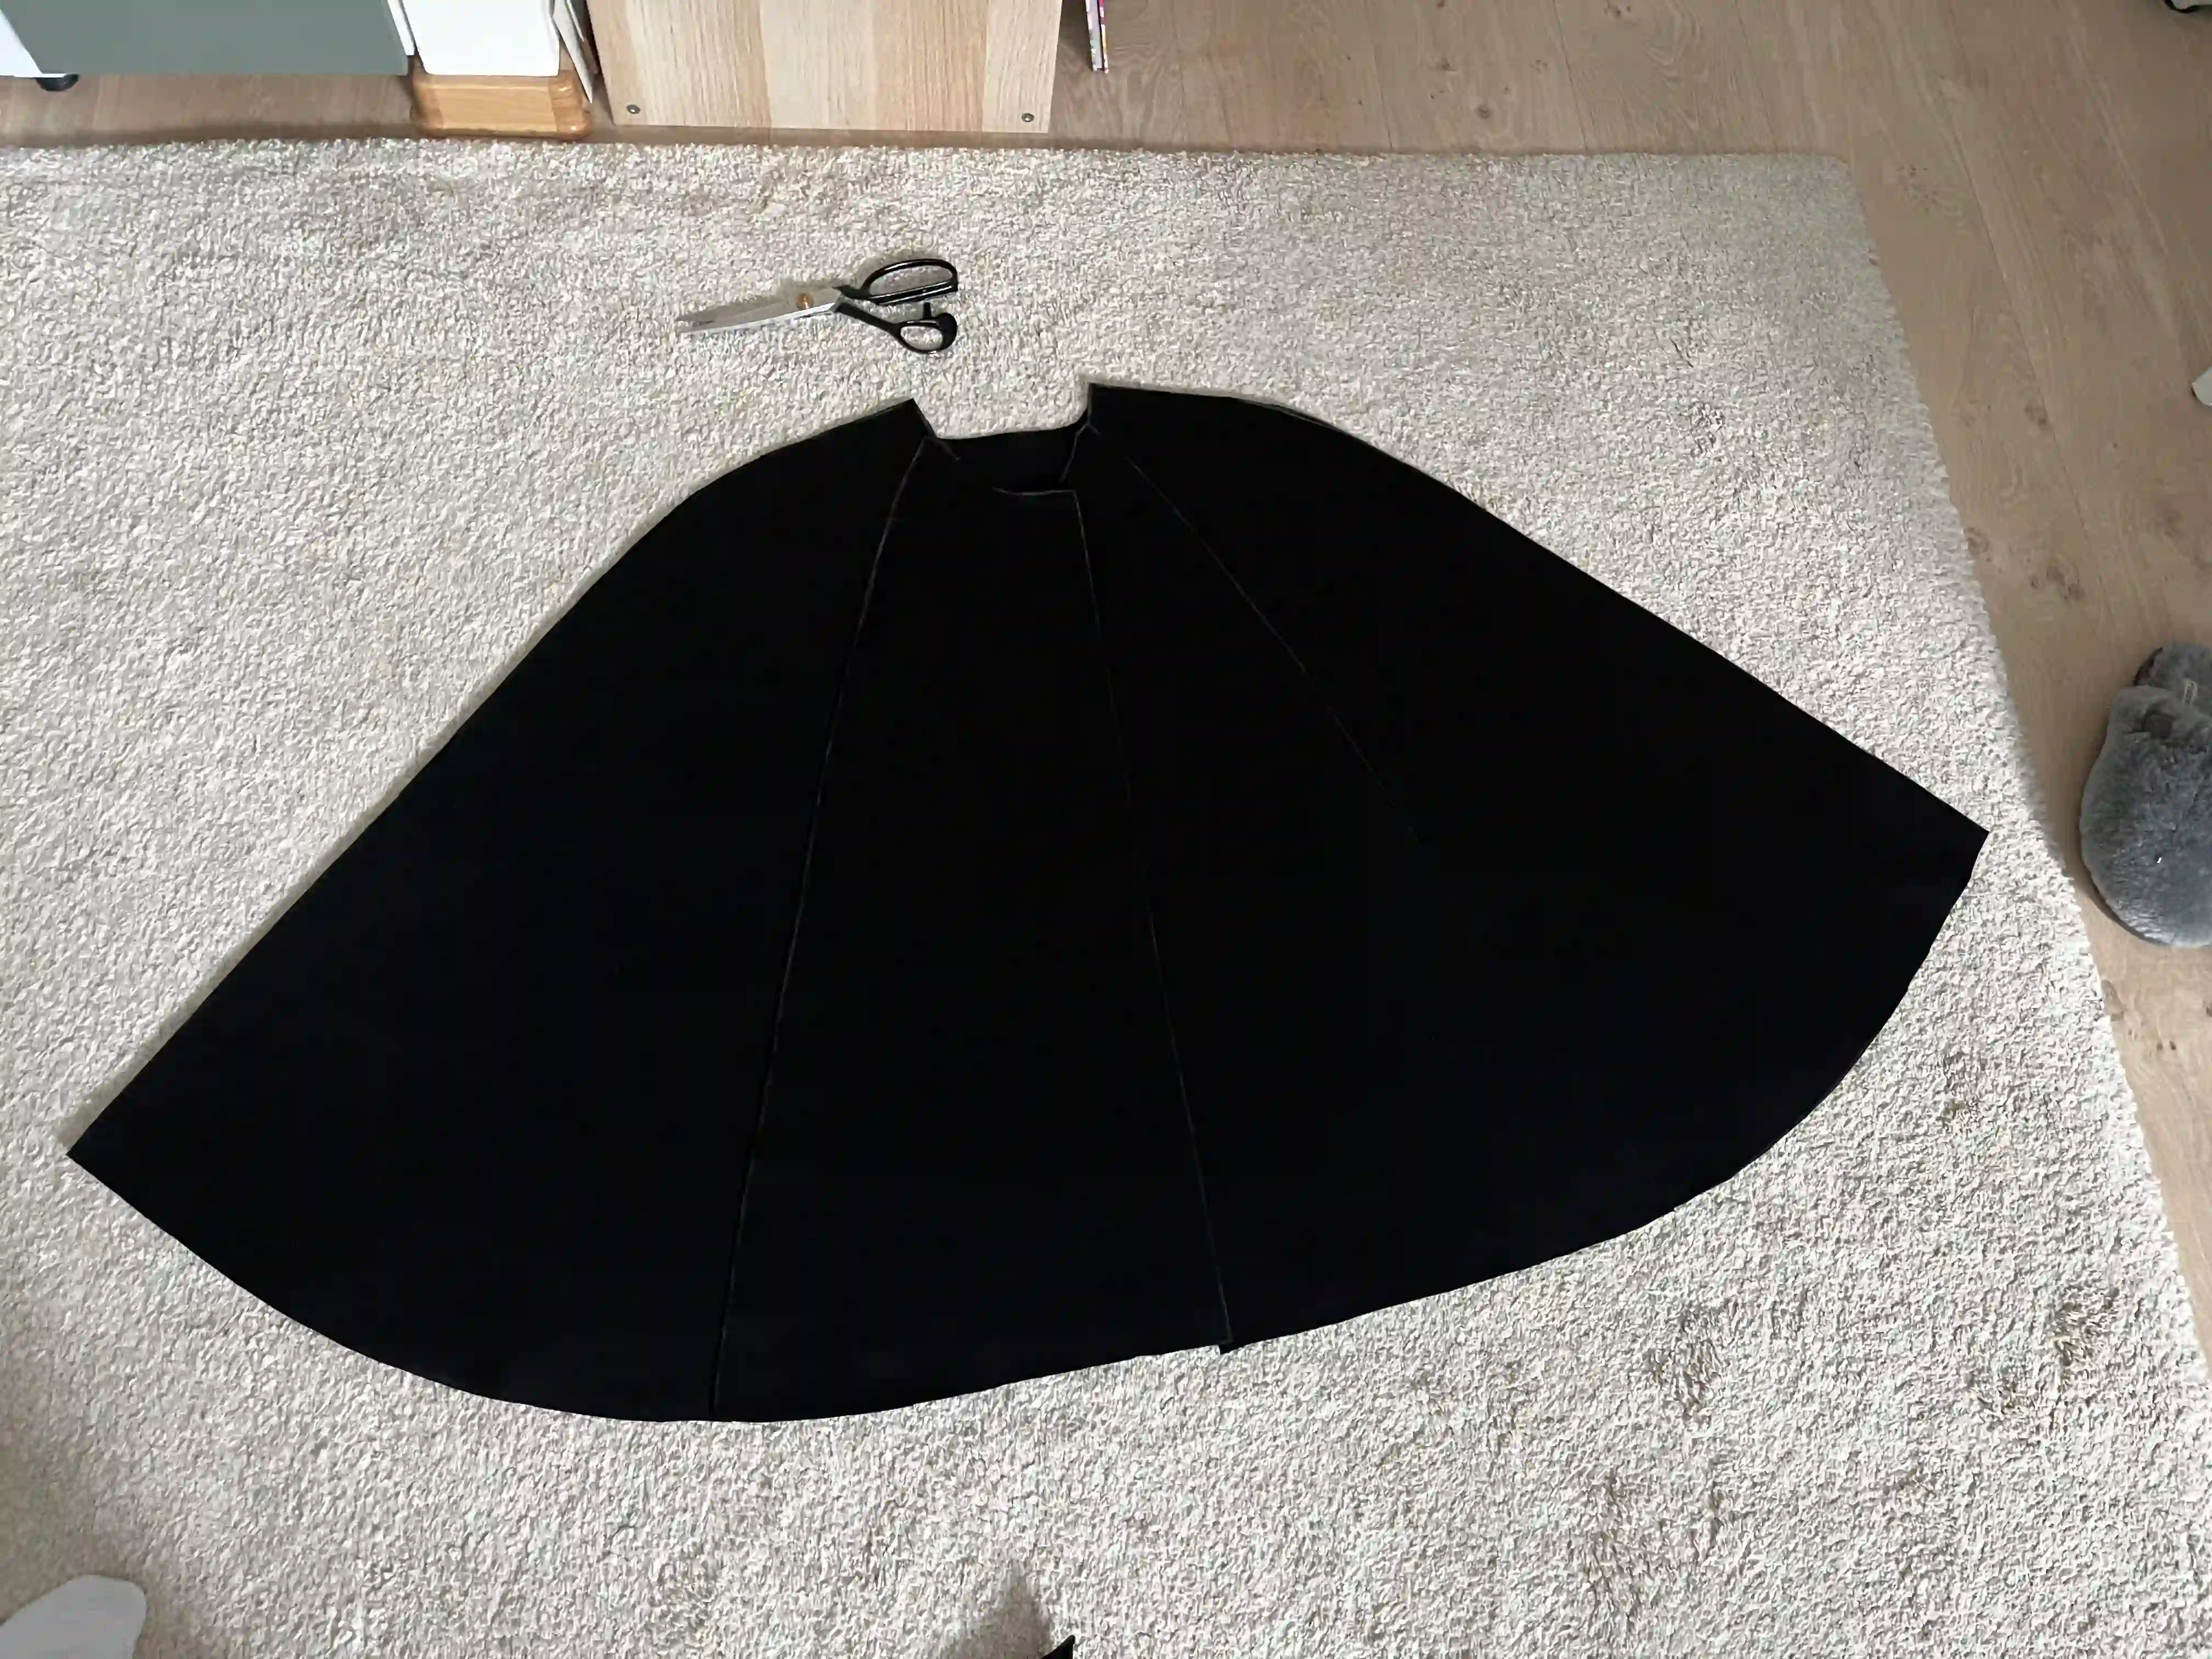
Before you start sewing, first check that all the cut-out pieces fit together correctly. You should have one large back piece and four front pieces, two on each side. When checking the fit, the two innermost front pieces might overlap slightly, as you can see in my photo. This is perfectly fine; when you put the cape on, these pieces will overlap, keeping the cape closed and keeping you warm.
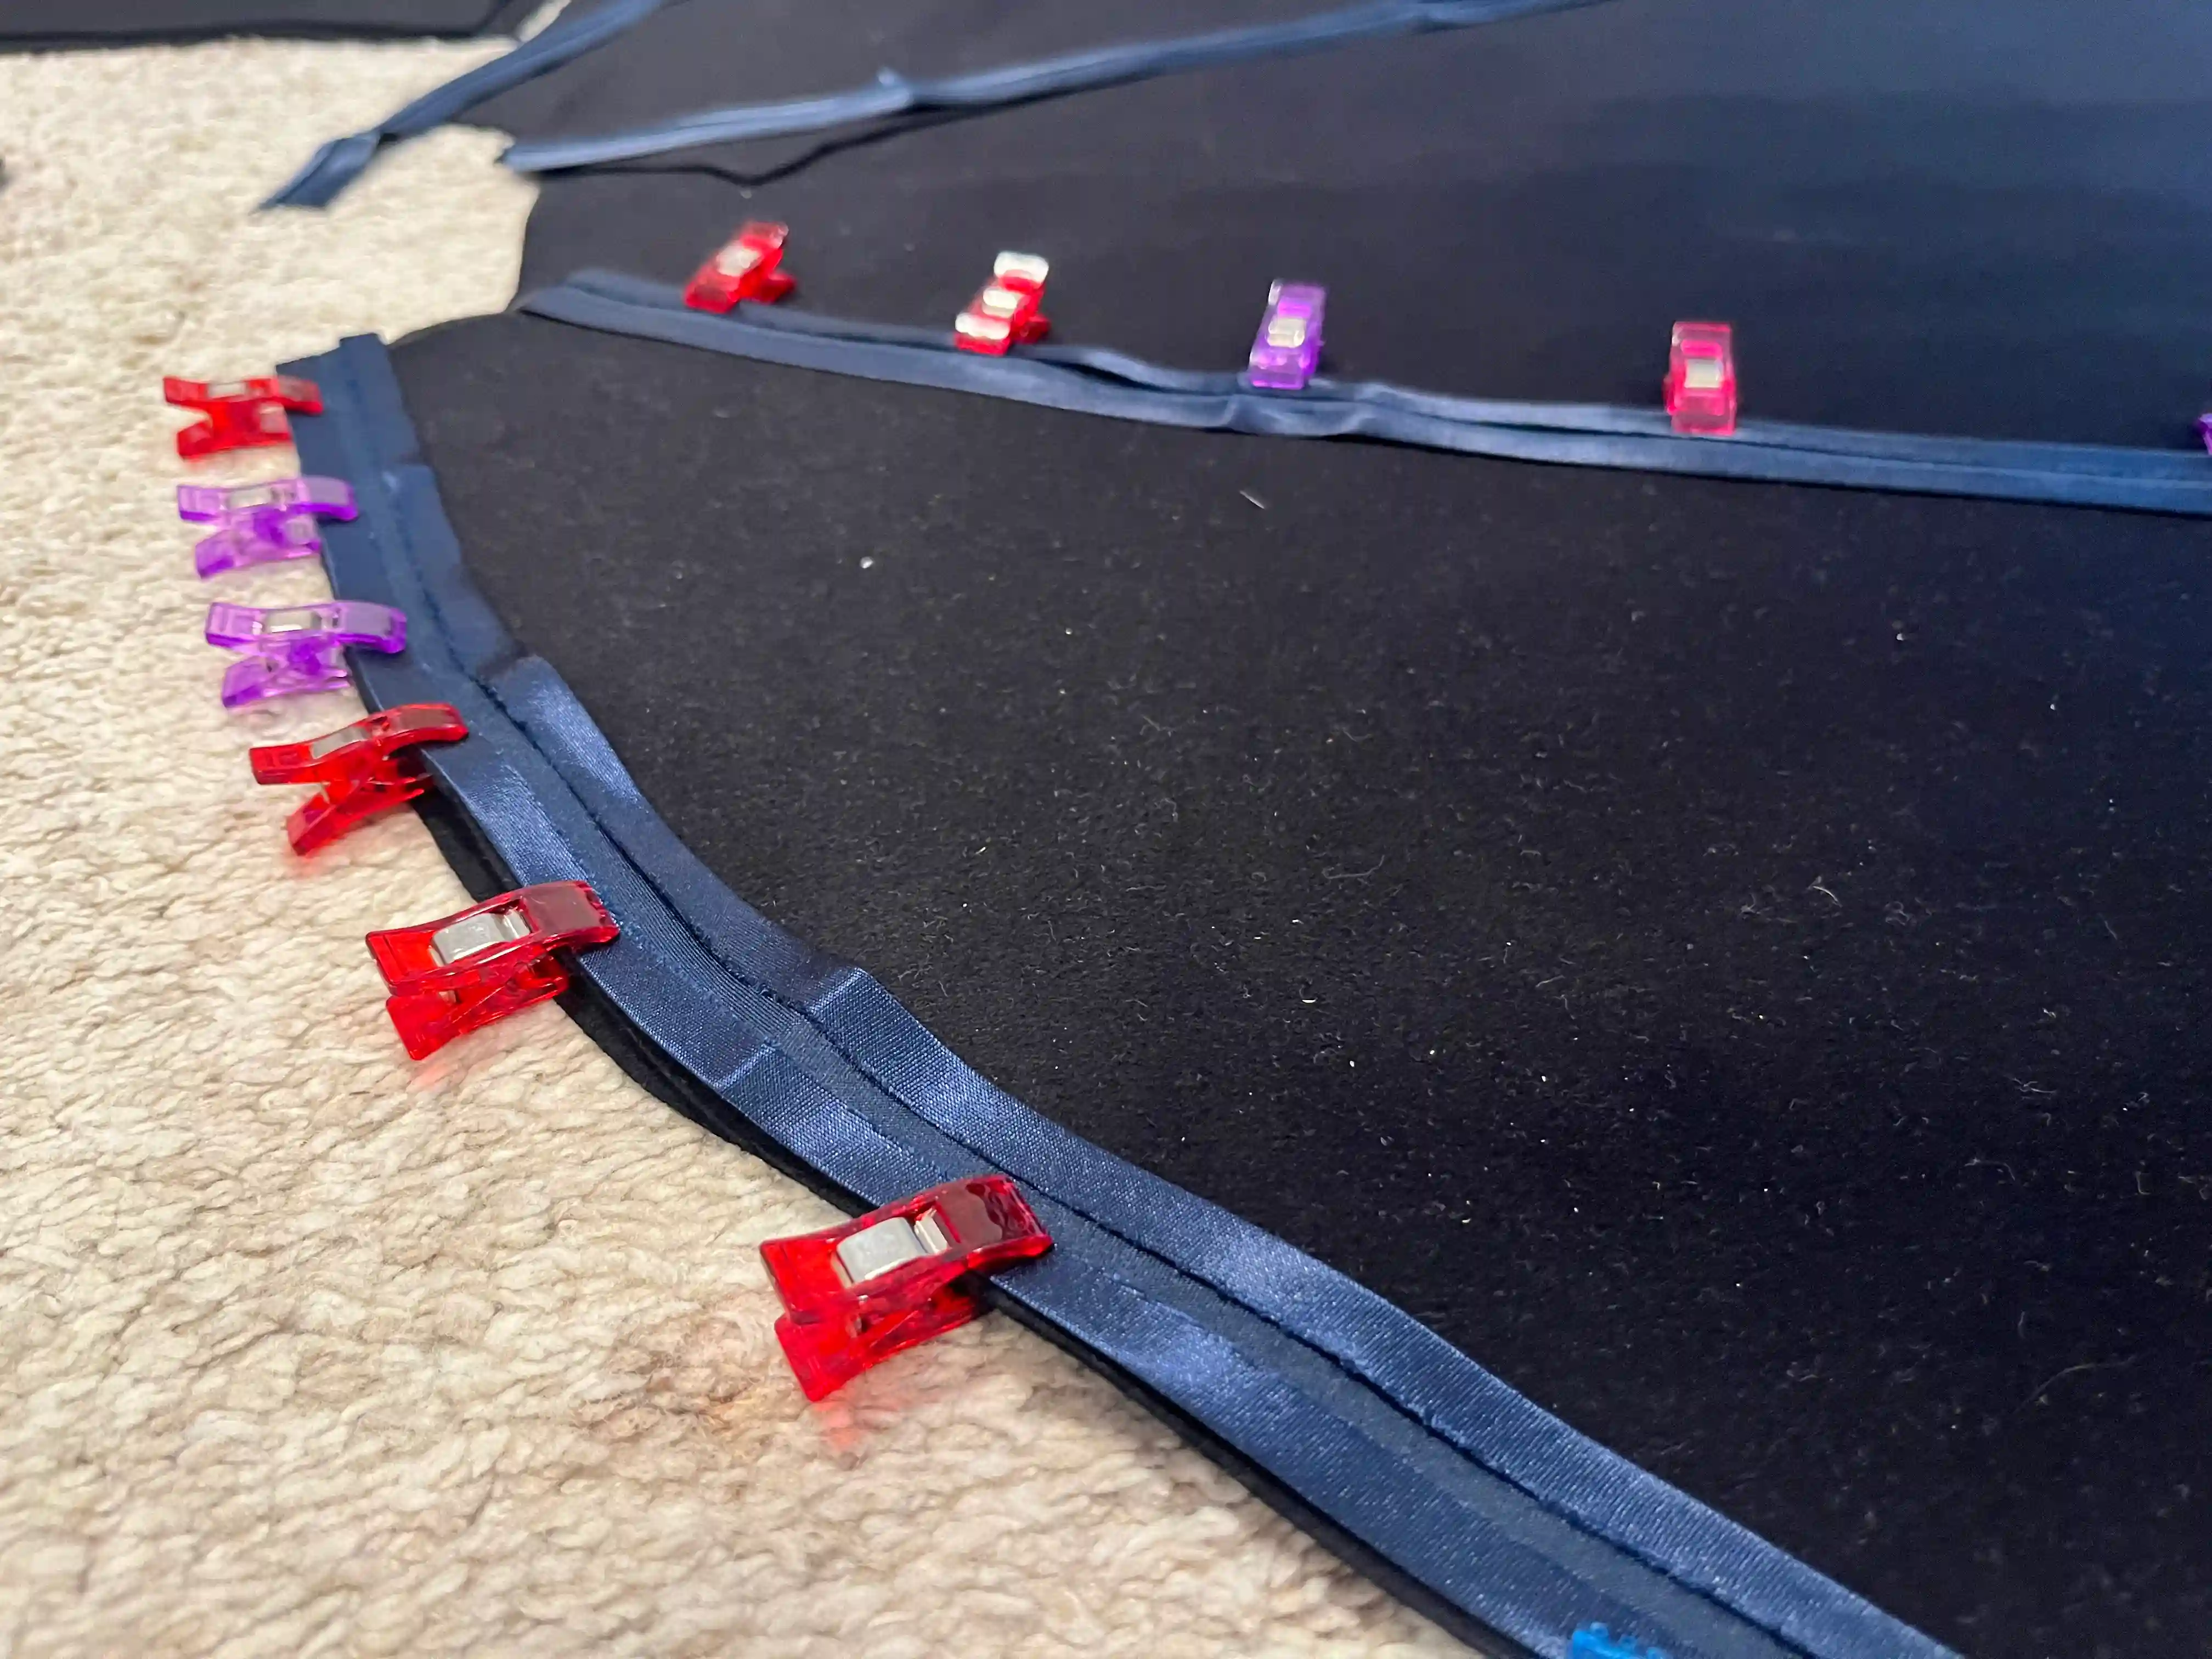
Before sewing, I prepared individual strips of decorative binding to finish the edges elegantly, applying them with a Hong Kong seam.
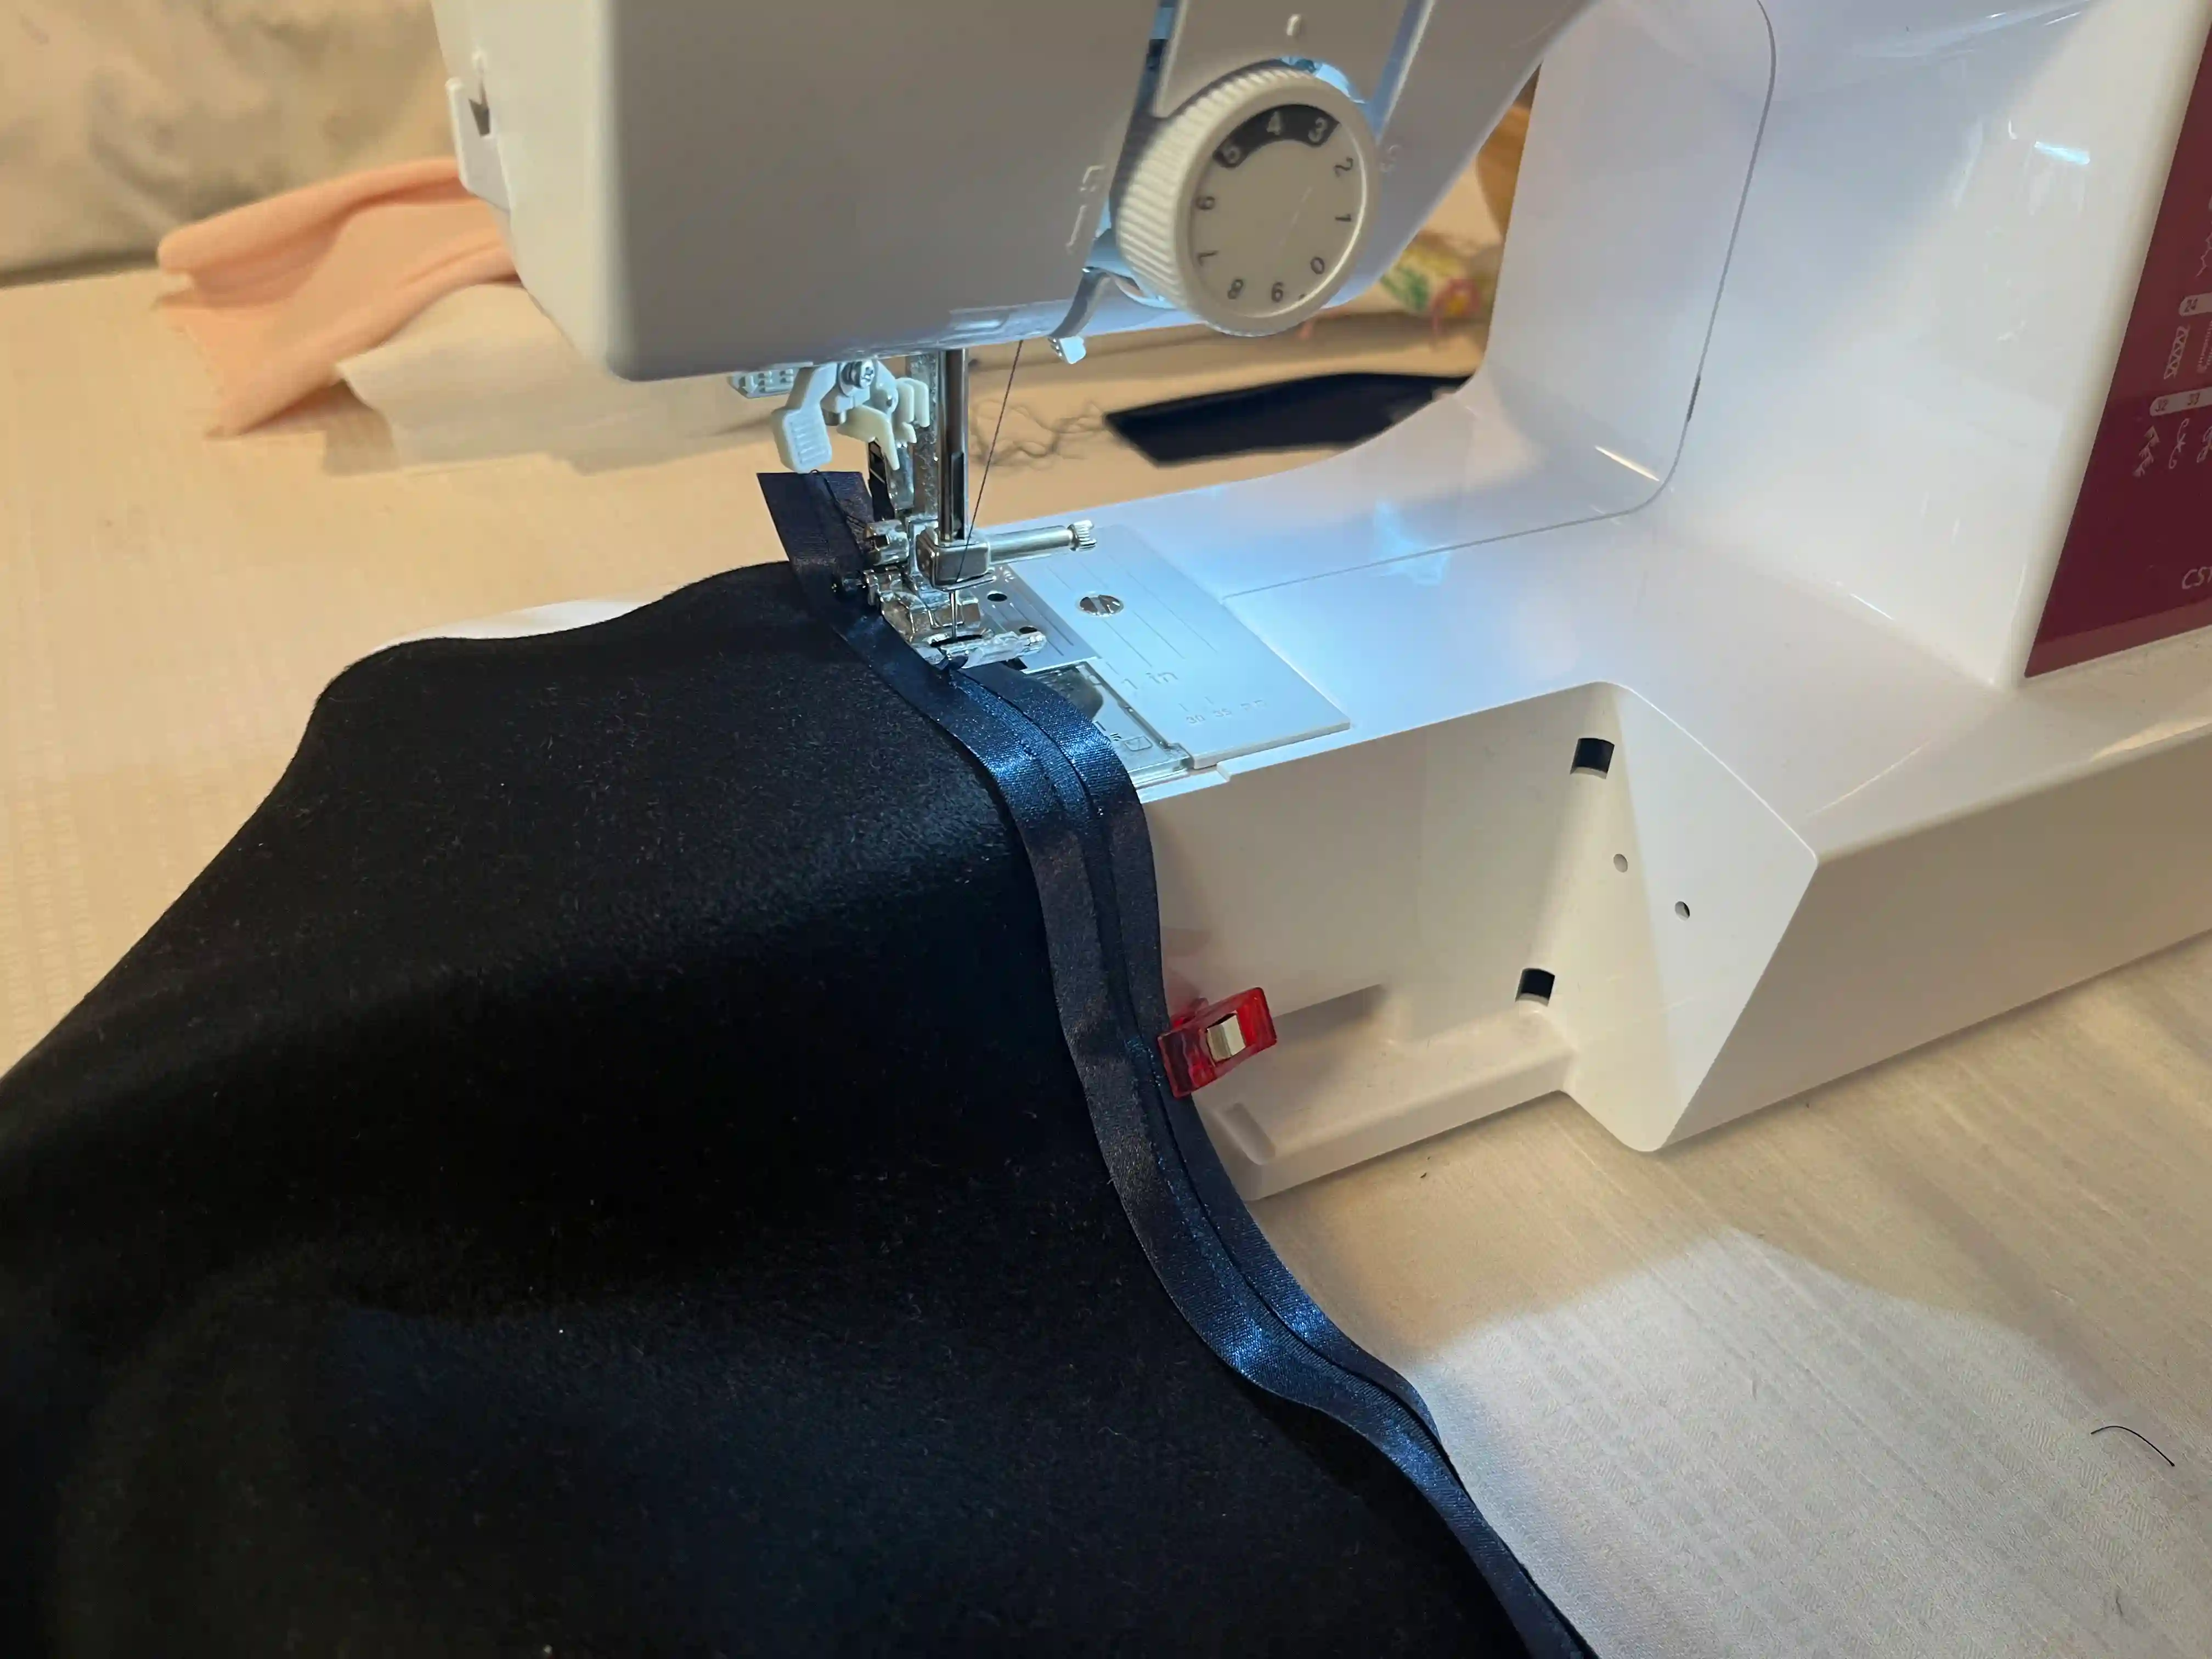
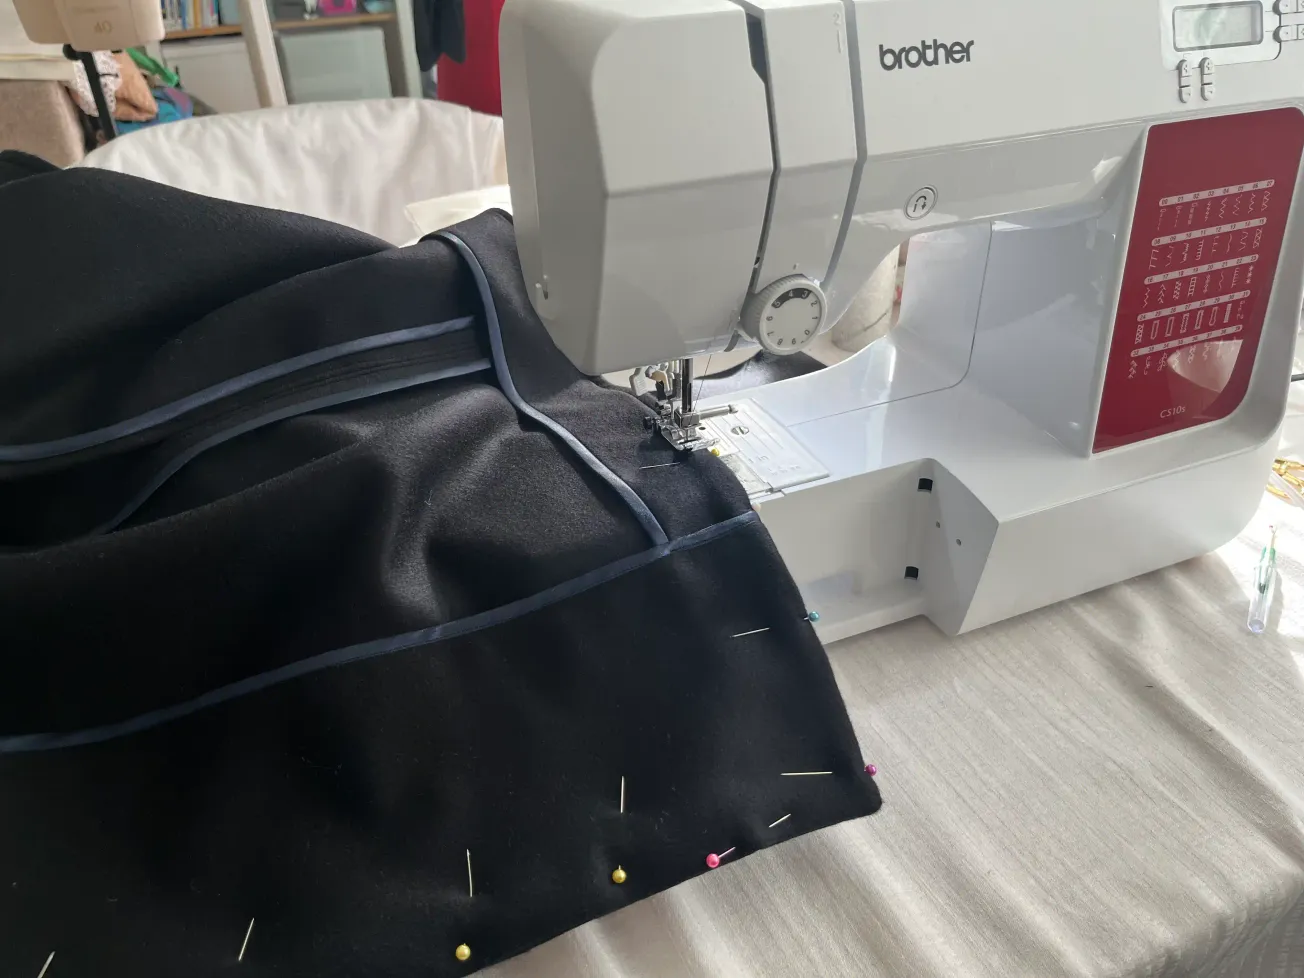
Sew the bias tape onto the right side of your cape, wrong side out, as shown in the photo. Then, fold the bias tape over to the back side. I finished the edges of the individual main pieces with bias tape before sewing the cape together, as it would have been very difficult to work on such large pieces once they were joined into the cape.
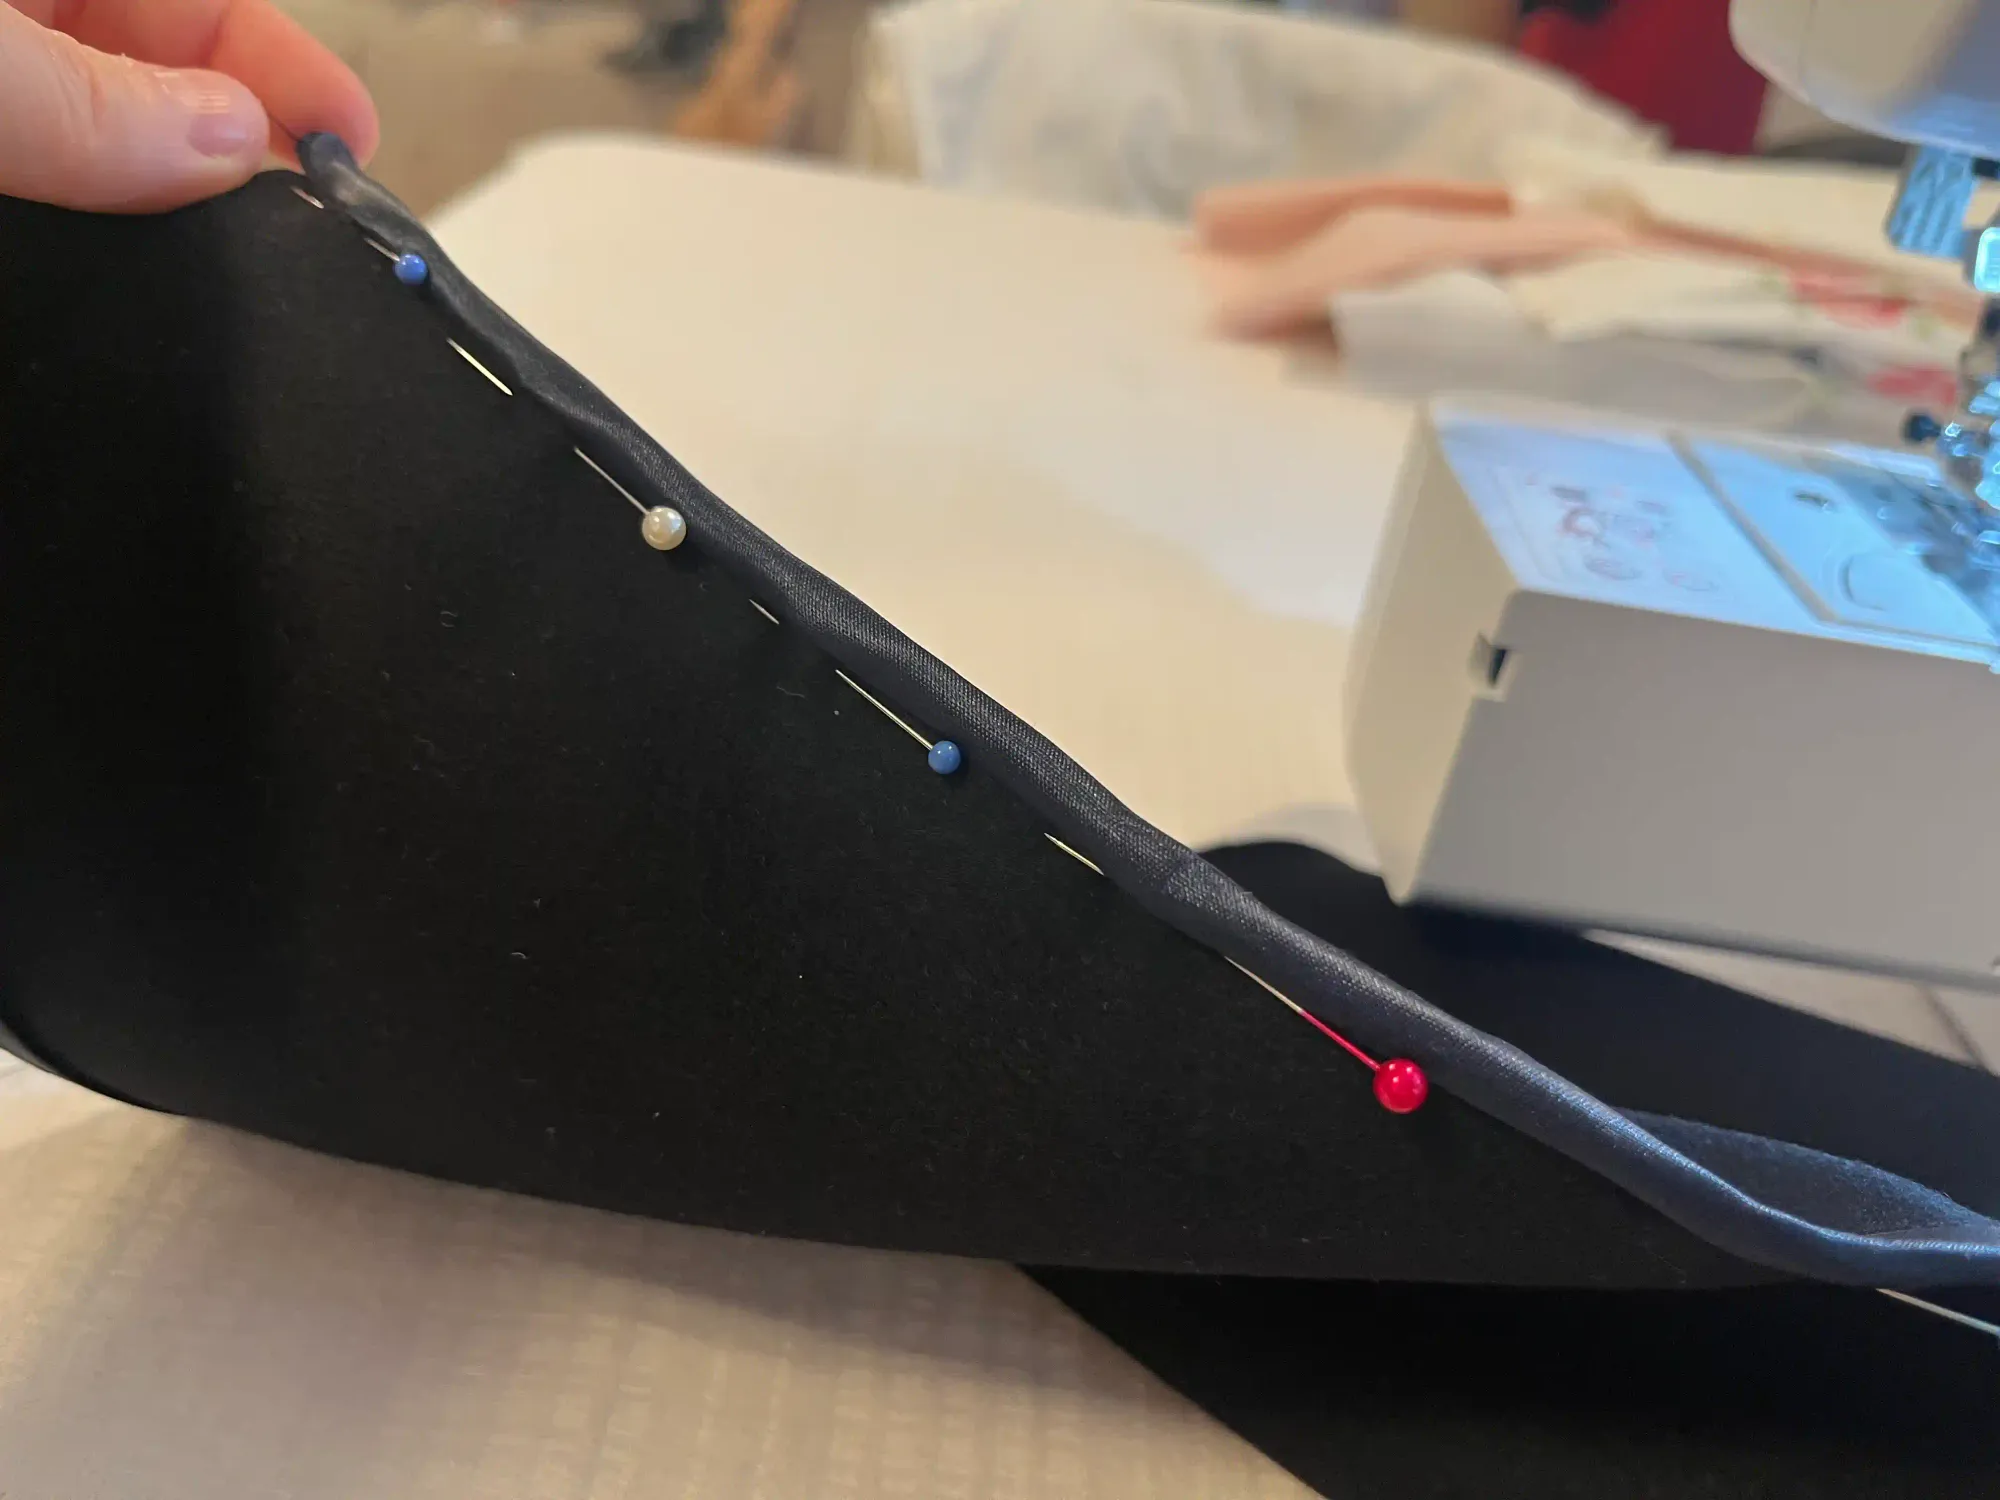
After sewing the binding strip, fold it over the edge to the wrong side and secure it with pins to hold it precisely in place. When topstitching, you need to catch the binding strip on the back; however, for an authentic Hong Kong finish, you must stitch so the needle lands exactly on the seam line between the cashmere and the binding strip on the front side; see the photo in the next step.
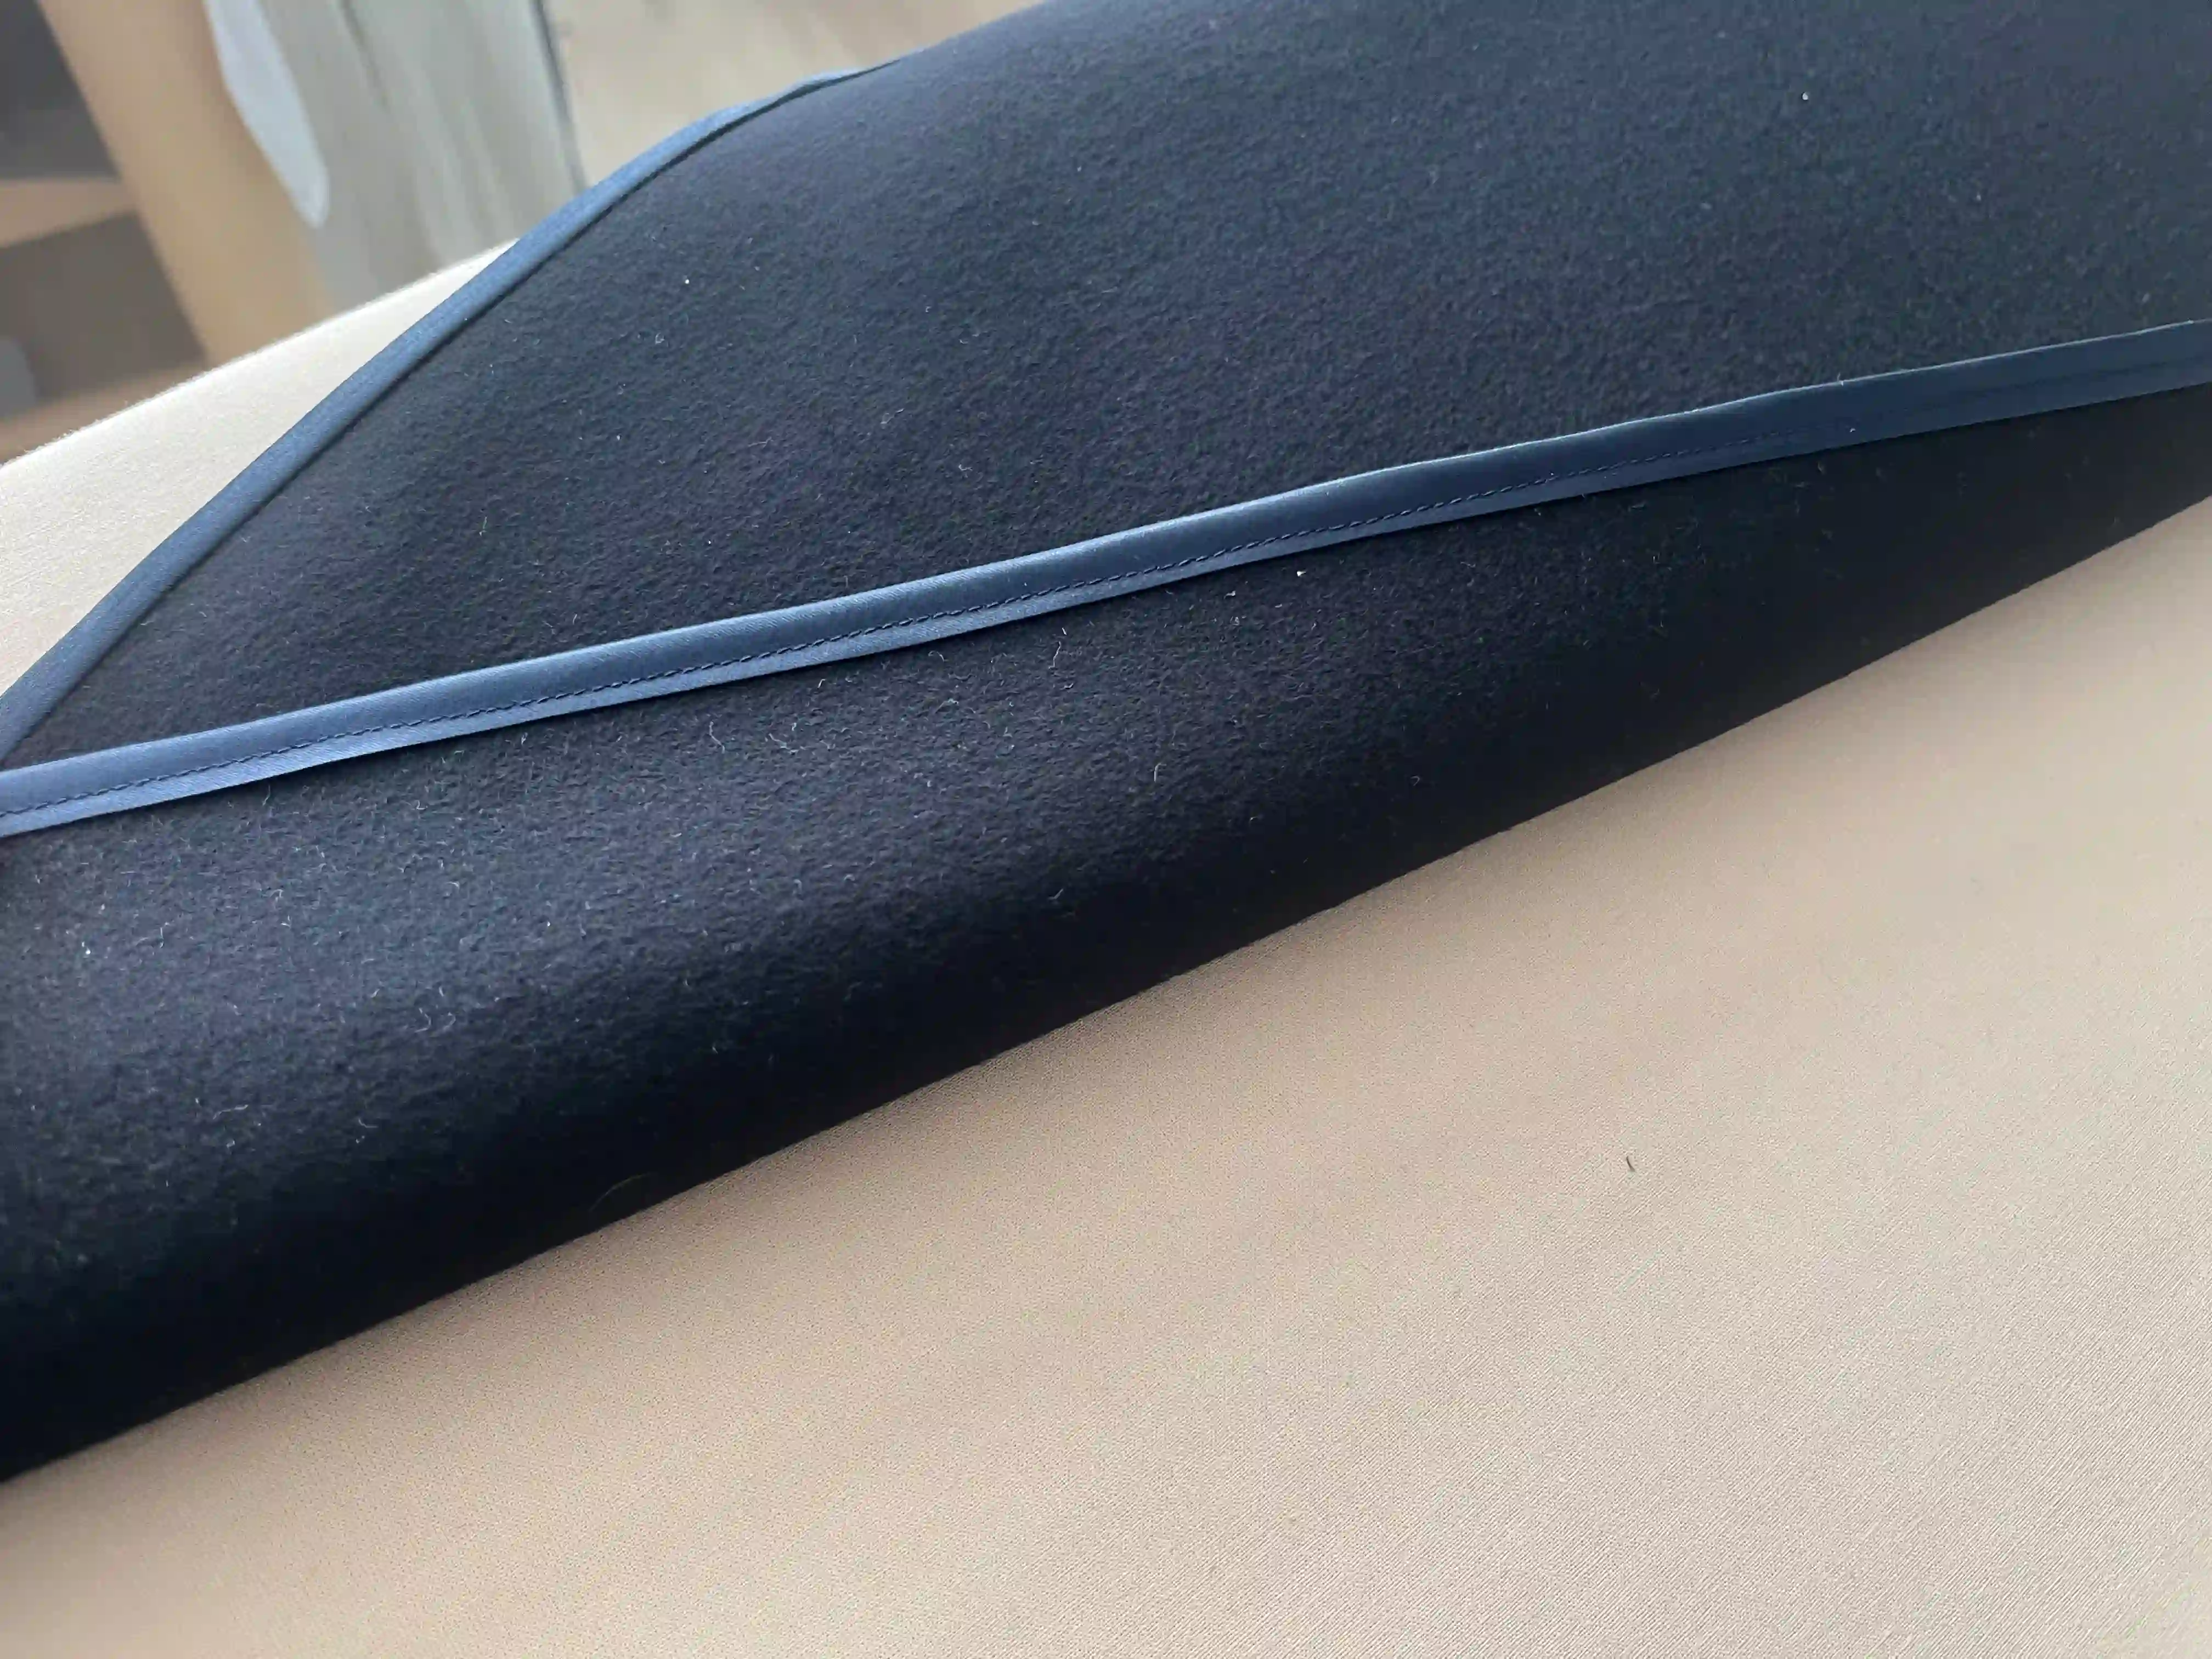
Precision is key when sewing a Hong Kong seam. Don’t rush. This was the most time-consuming part of the entire cape, but the final result is well worth it. I sewed very slowly to ensure I was stitching exactly along the join between the black cashmere and the blue bias binding. In the photo, you can see what it looks like when the fabric is stitched correctly. The underside is neatly finished; once the coat pieces are folded and joined, the visible part of the seam looks as if there is no seam at all; the fabric simply holds together perfectly.
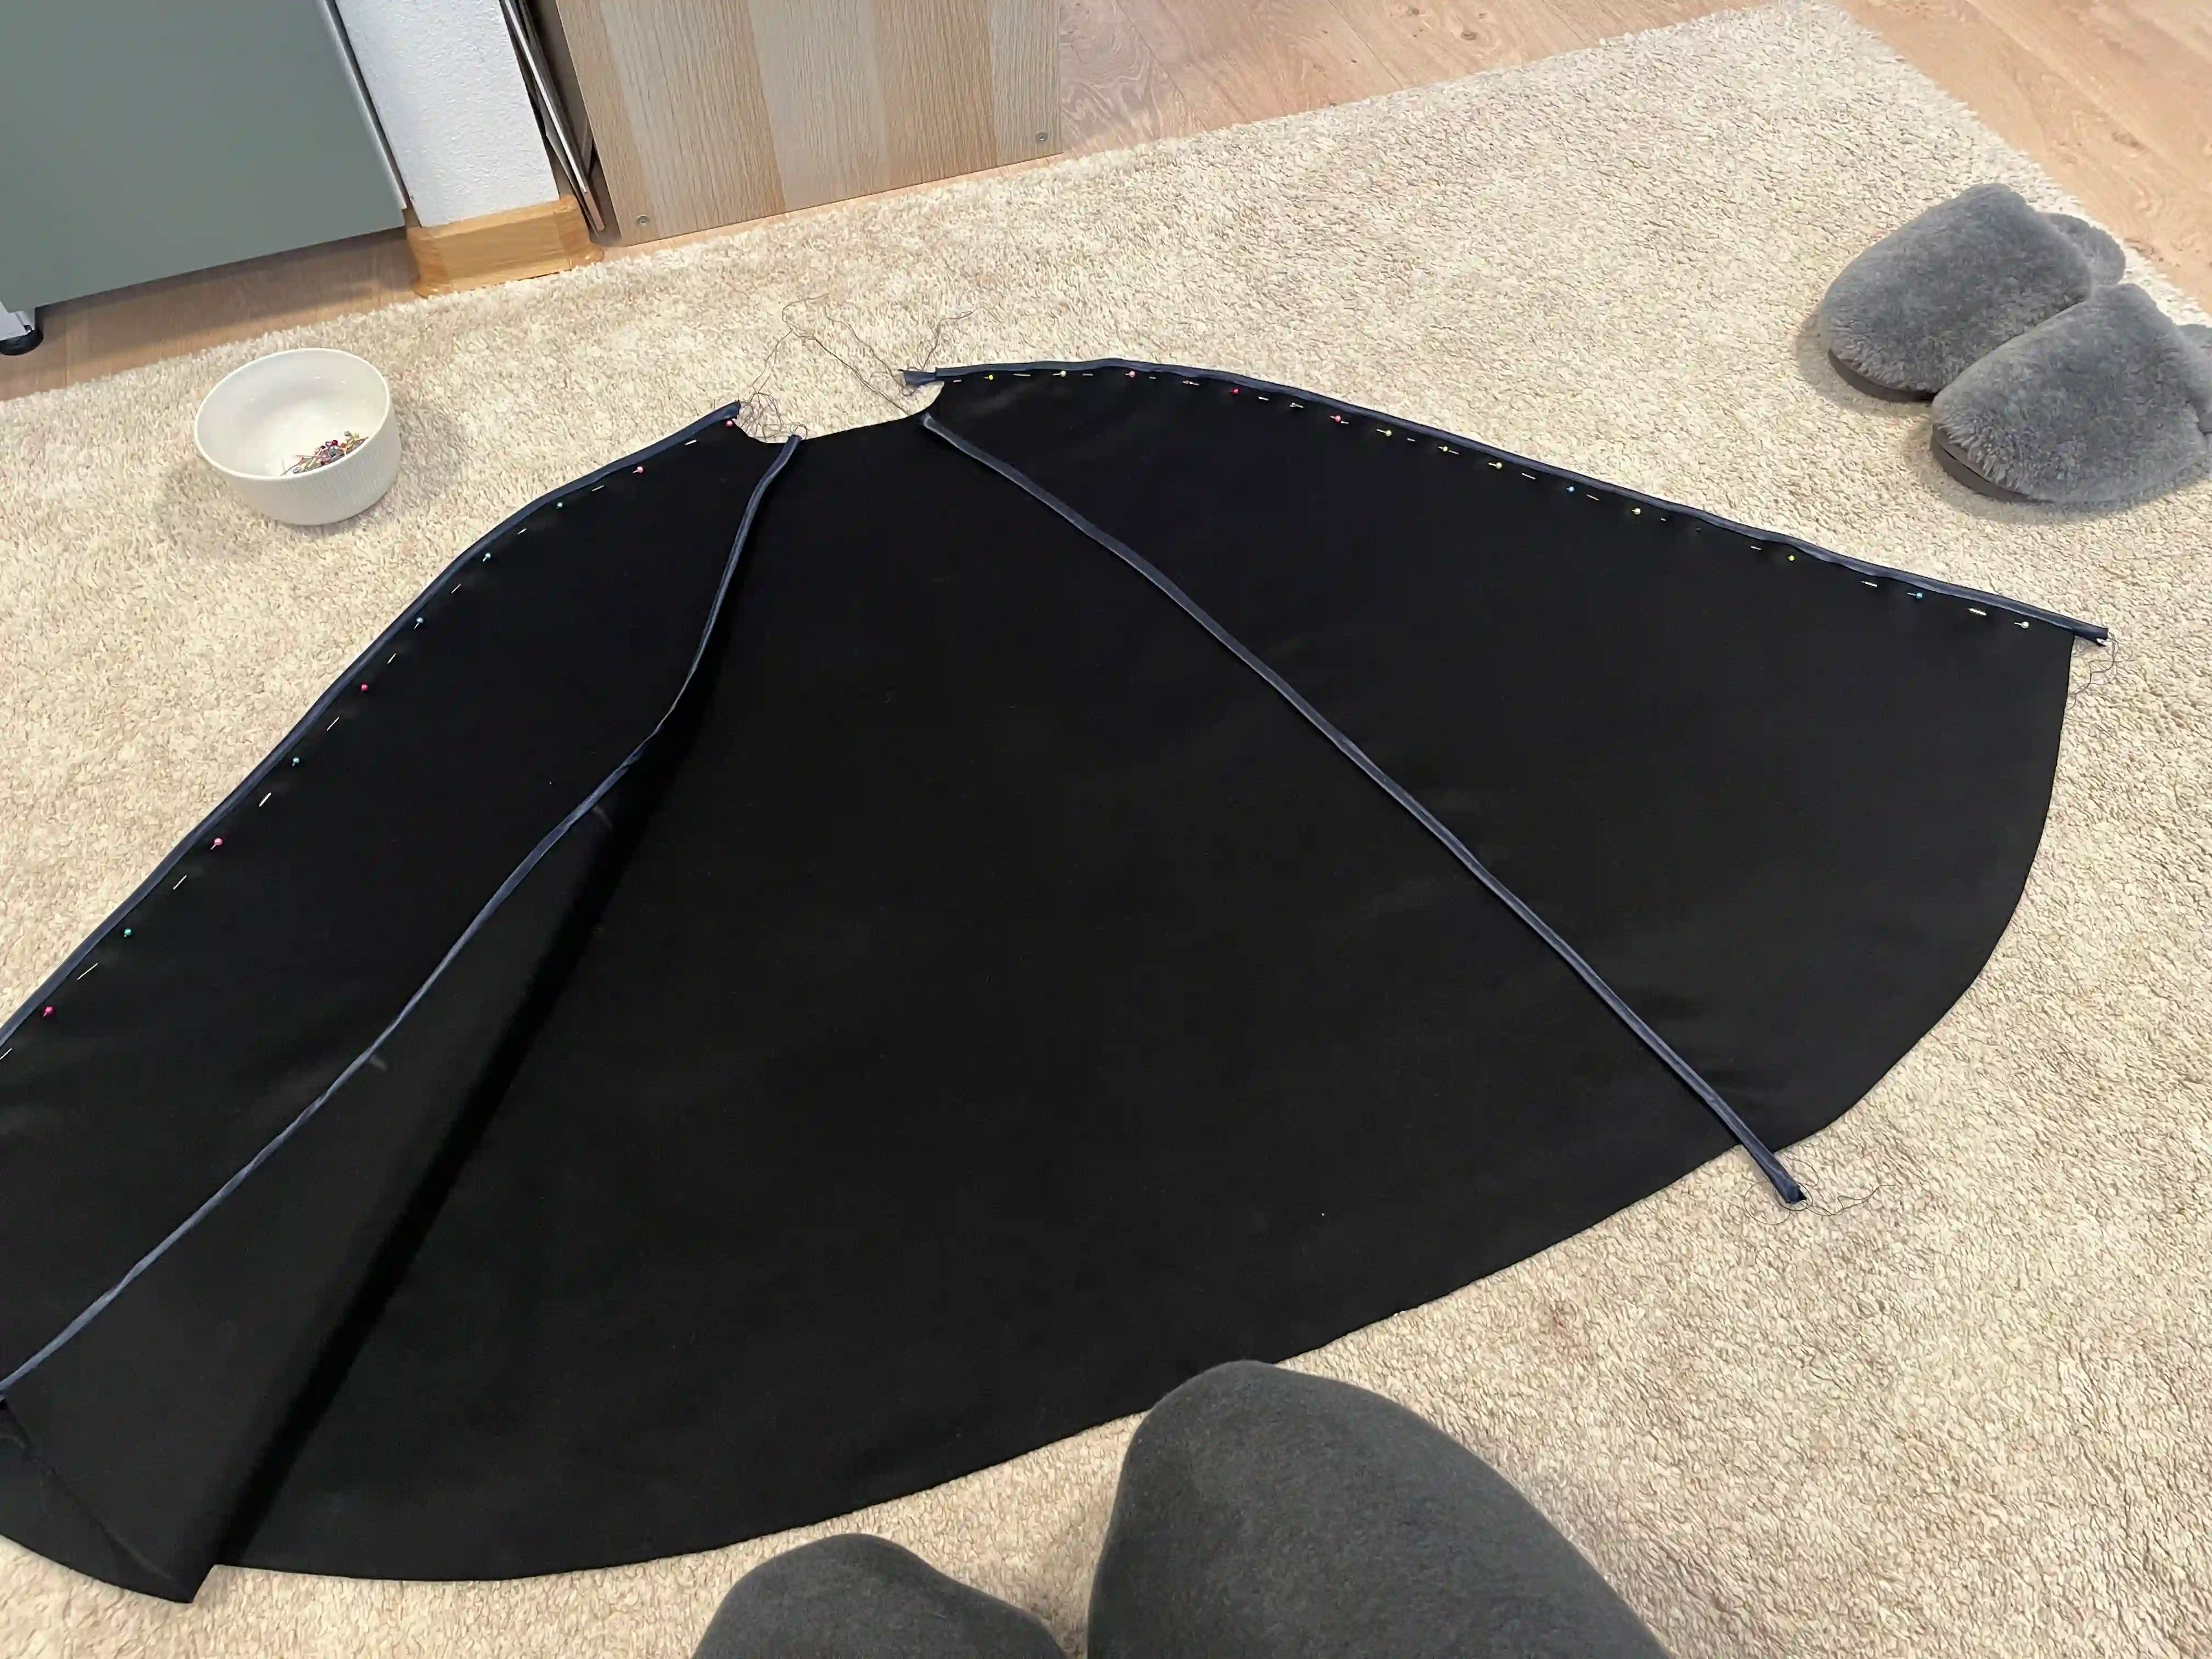
Now, join the main sections of your cape together, right sides facing, as shown in the photo. Sew the pieces together, then open up the seam allowance and stitch along both sides of the opening; this creates a beautifully finished seam on the outside and a neatly opened edge on the inside, accented by a decorative strip.
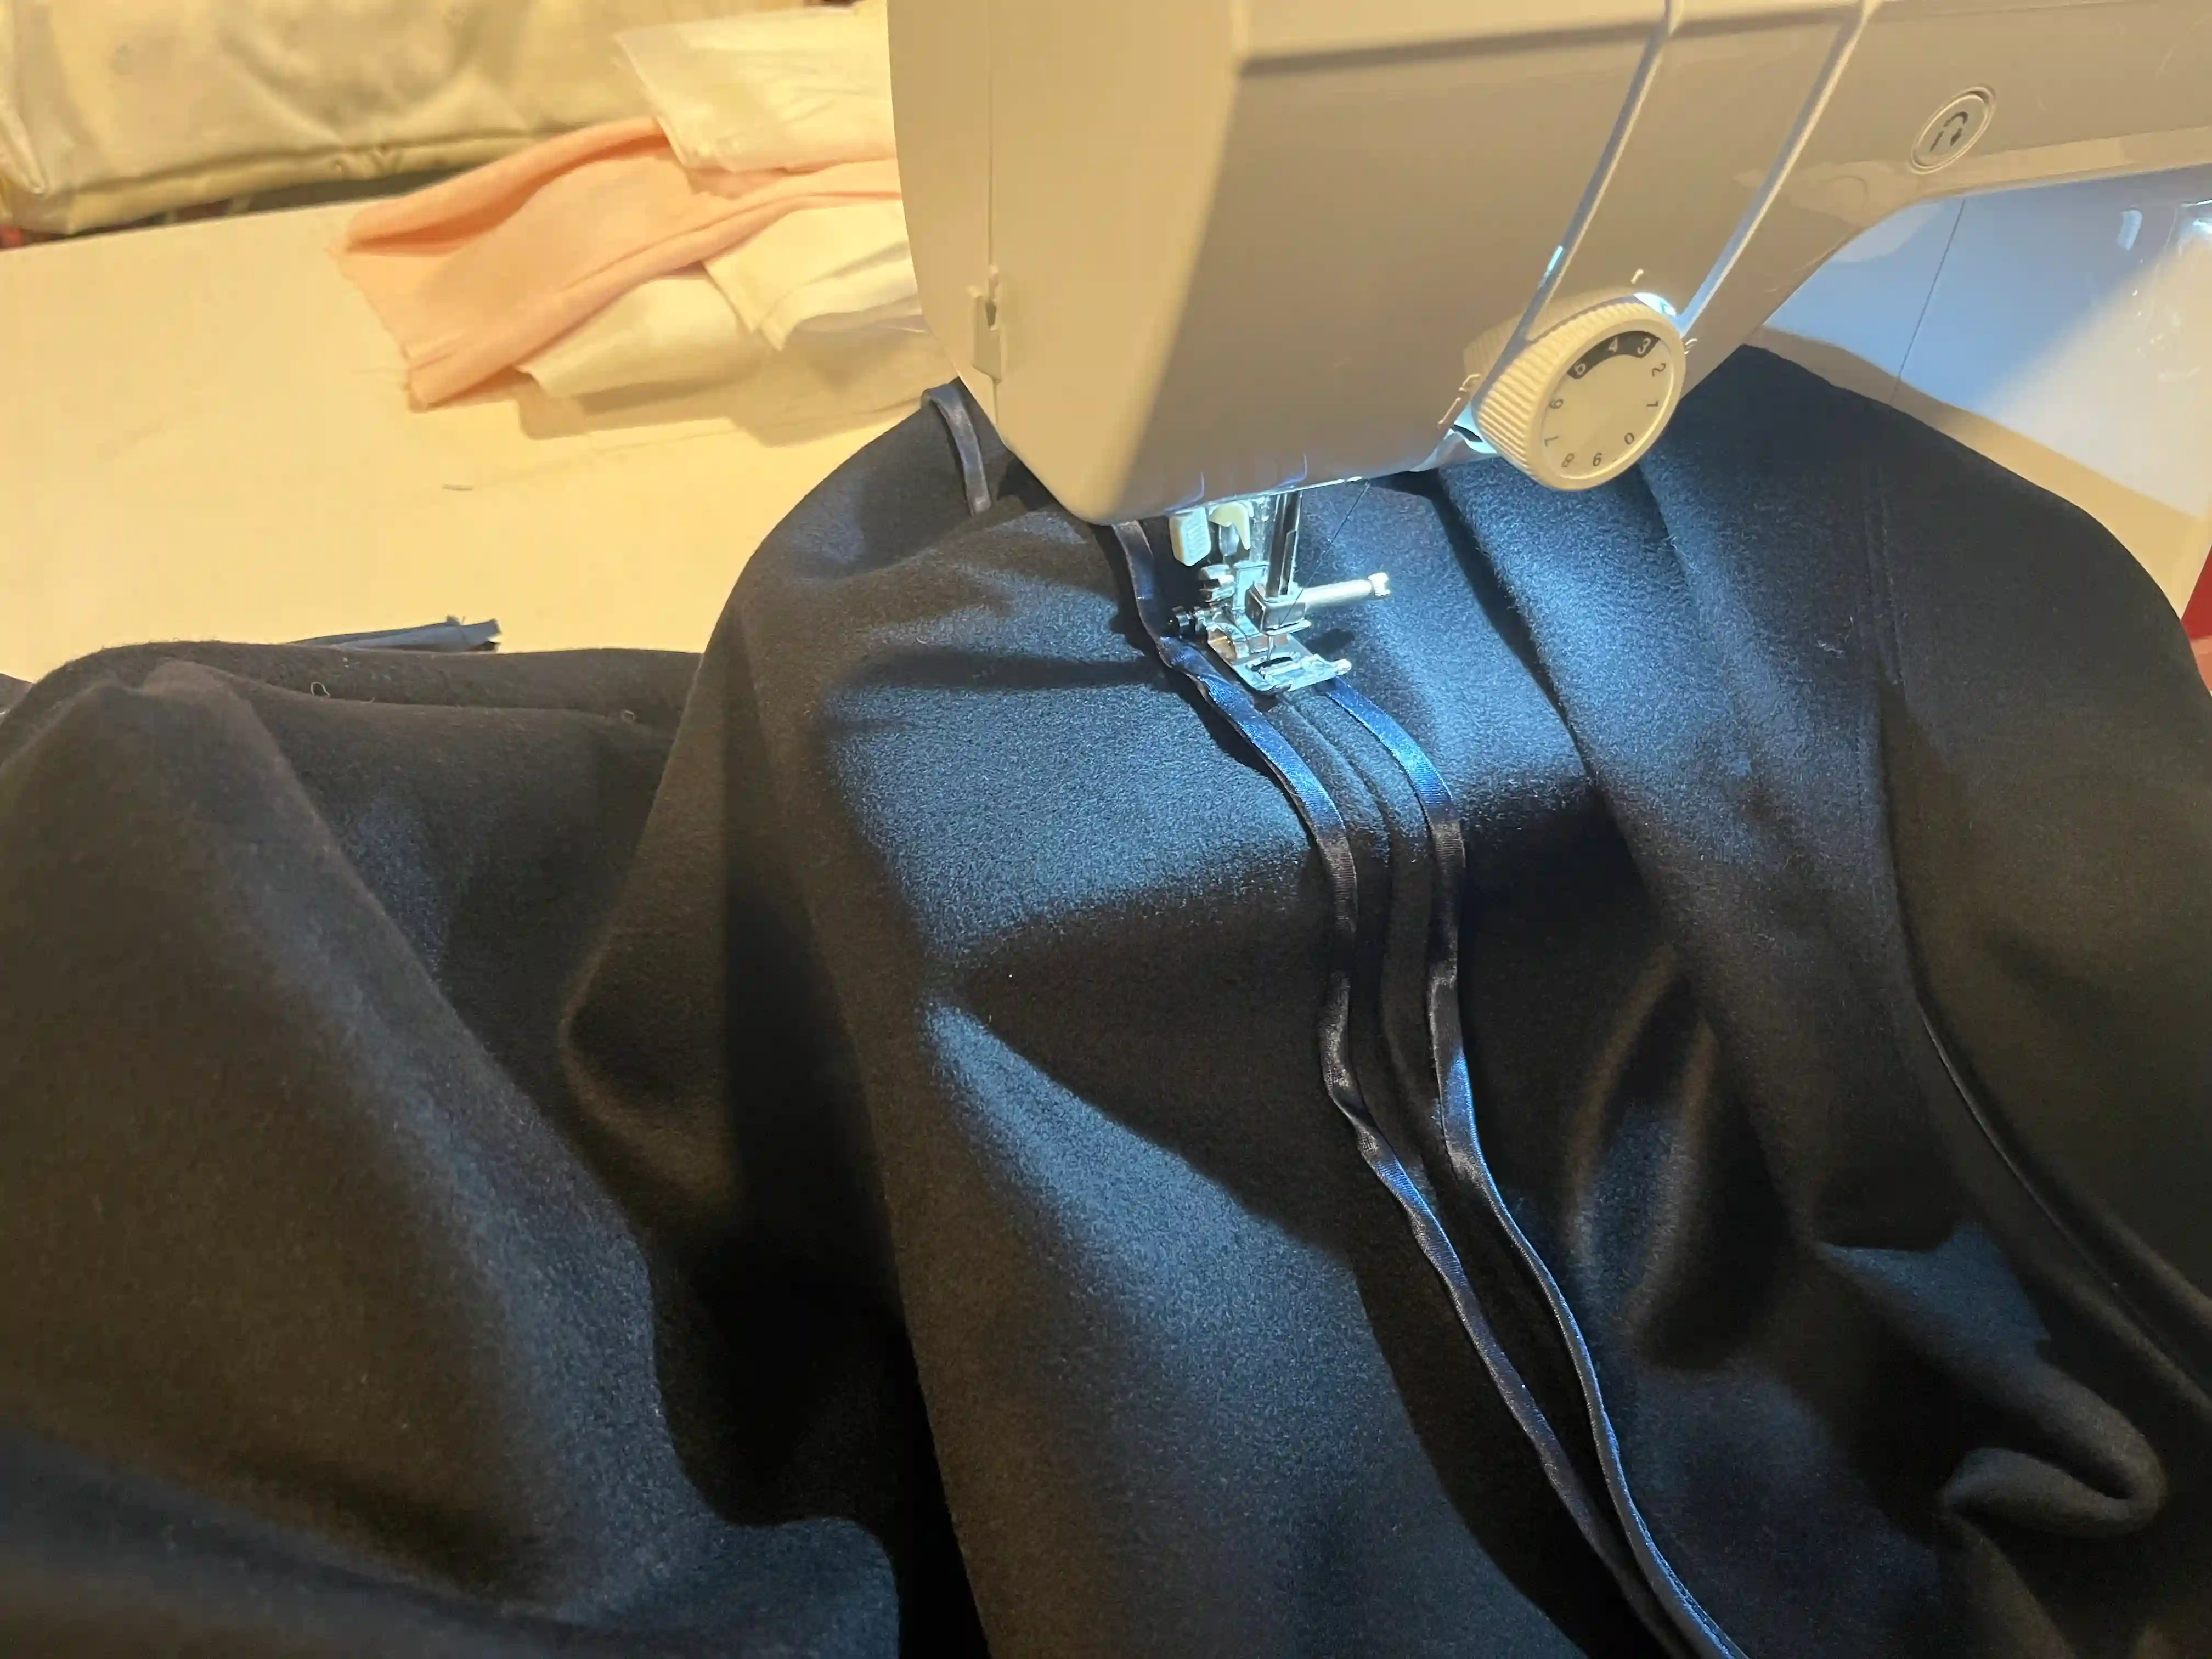
Now, open the stitched seam and sew along both sides with your sewing machine so the seam stays firmly held open, as shown in the photo. In the top right corner, you can see what the stitching looks like from the outside. It creates a beautiful, sturdy decorative seam that helps your cape maintain its proper shape.
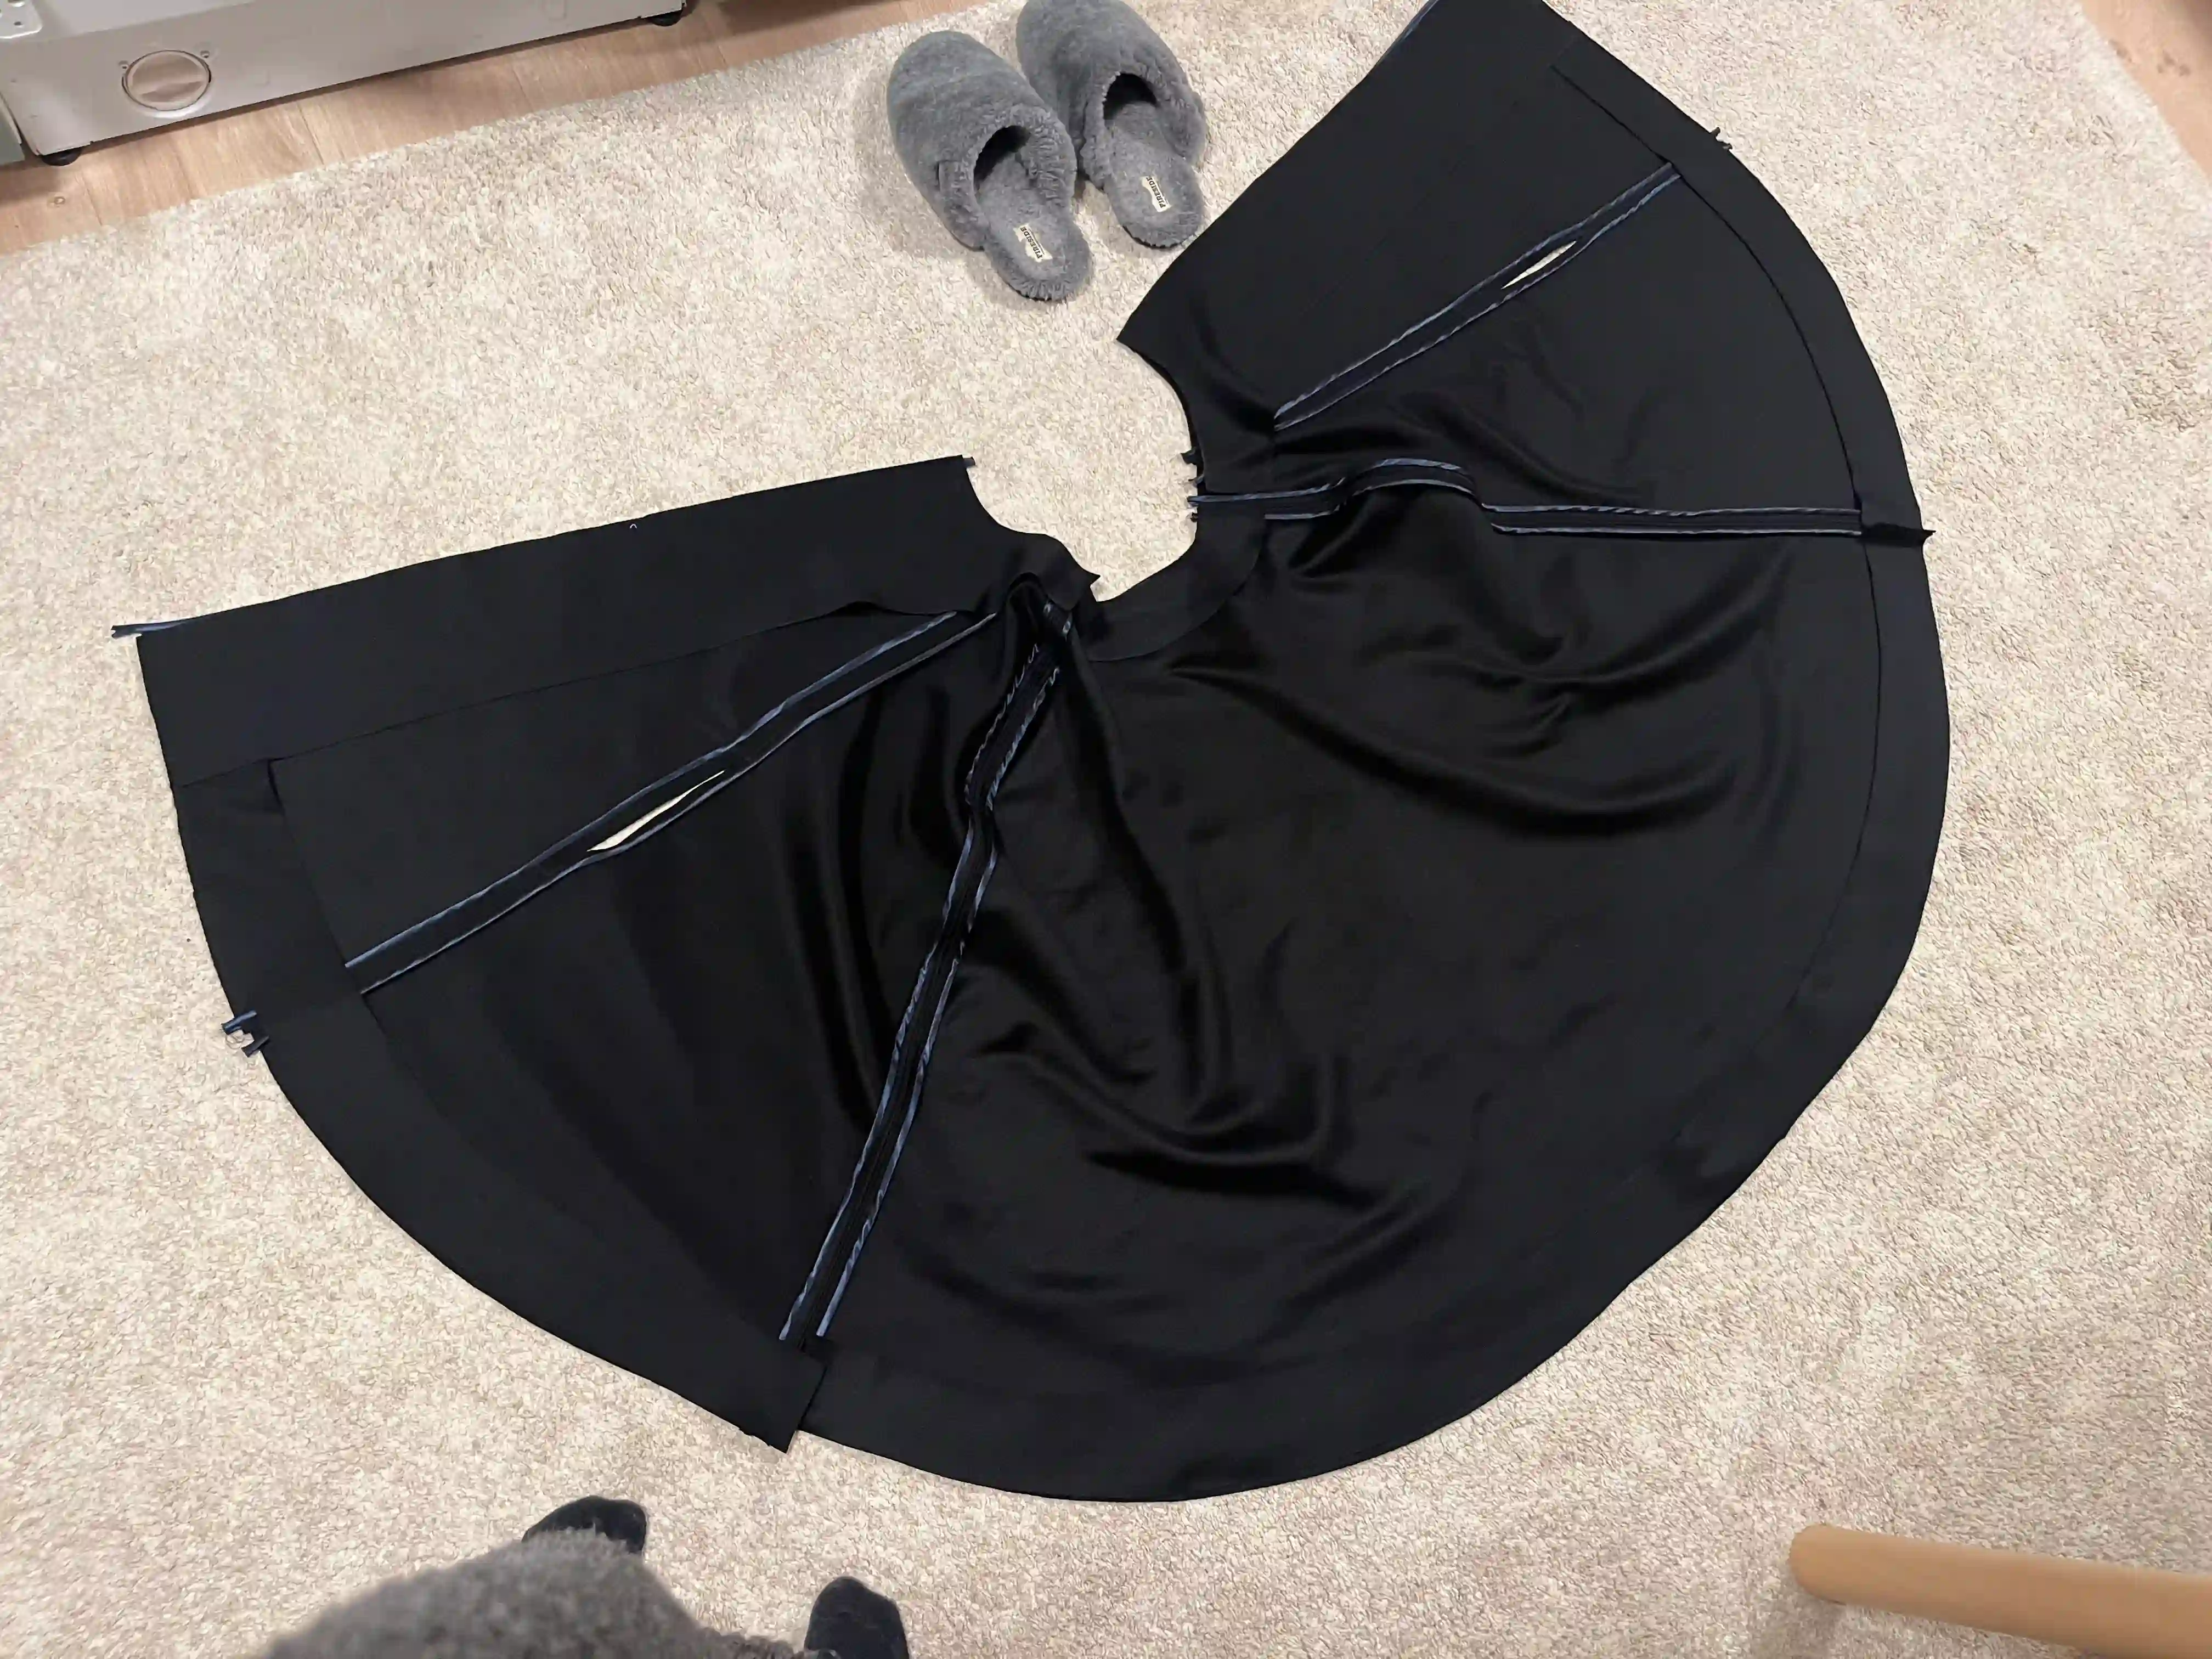
Once the individual pieces have been sewn together, prepare an inner strip to be attached along the entire circumference of the cape. Bind the edges of this strip with bias tape to ensure a neat finish. Before sewing on the bias tape, hold the pieces against the assembled cape to verify that the strip matches the dimensions of the cape exactly. Only then should you decorate the strips with ribbon and sew them together, using the same method as the cape.
Finally, pin this prepared inner trim to the cape by wrong side out in both cases to create a single, finished cape and sew around the edge.
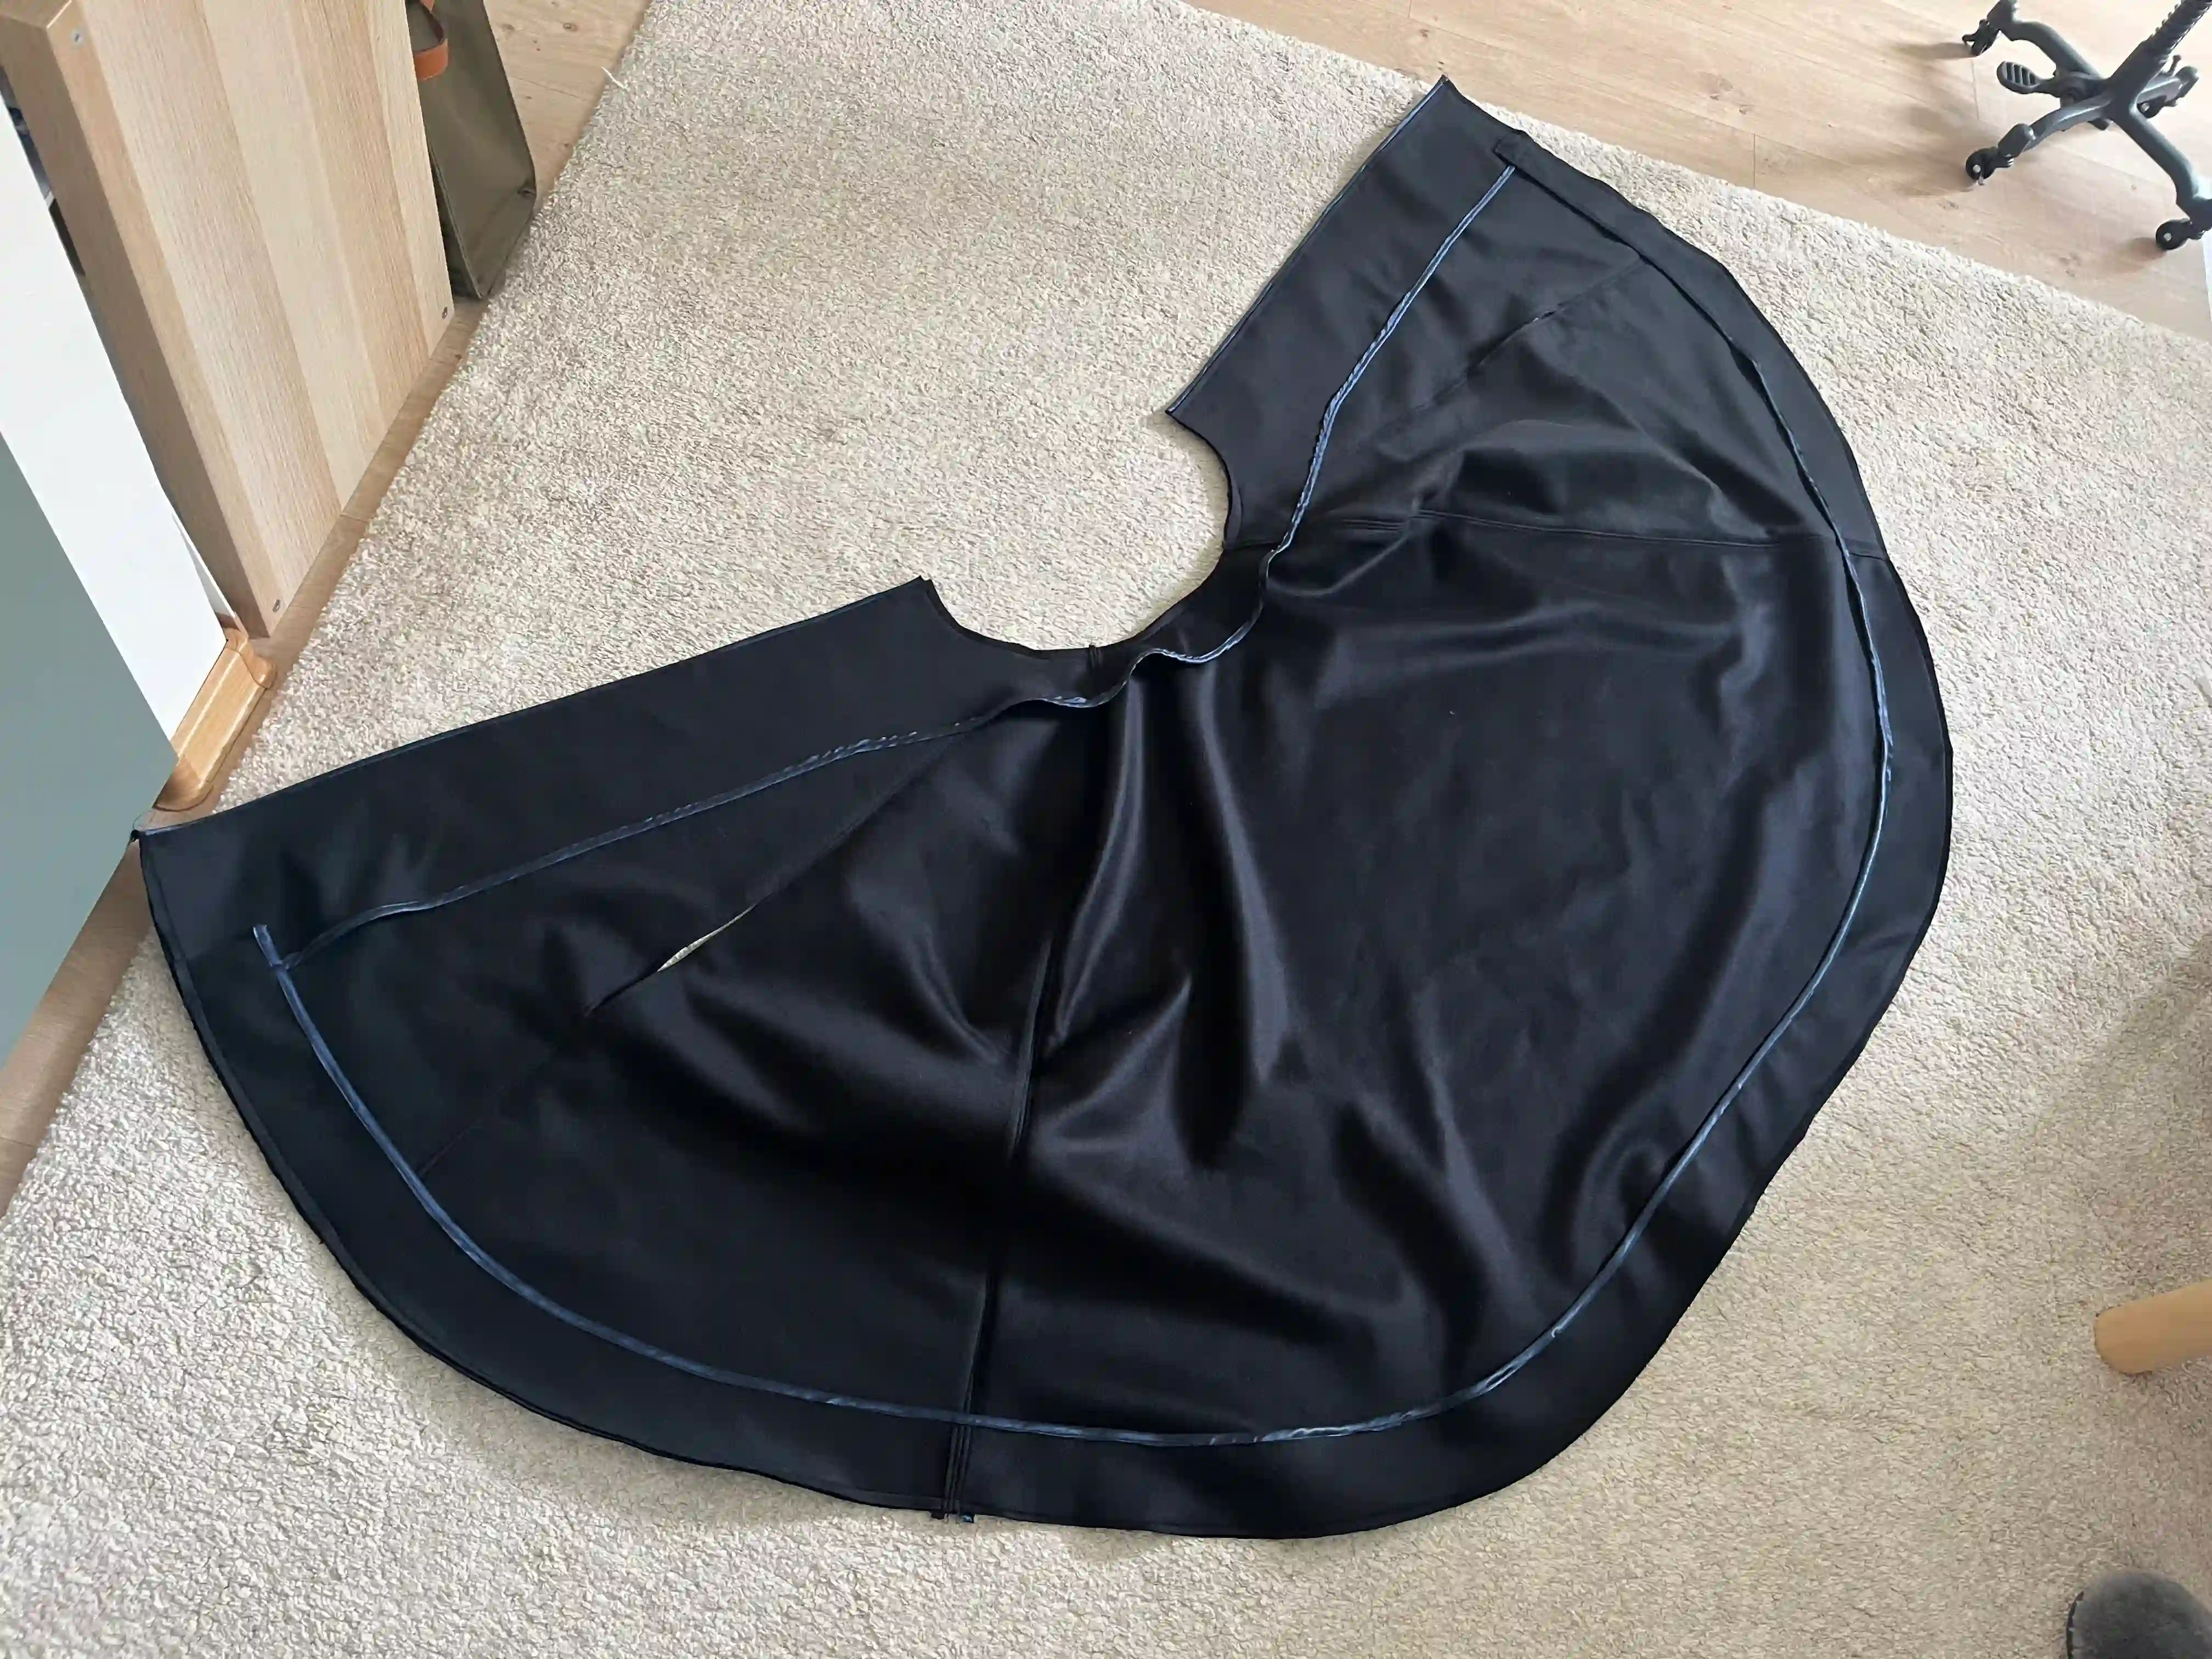
Final style from the inside before you turn by right side out.
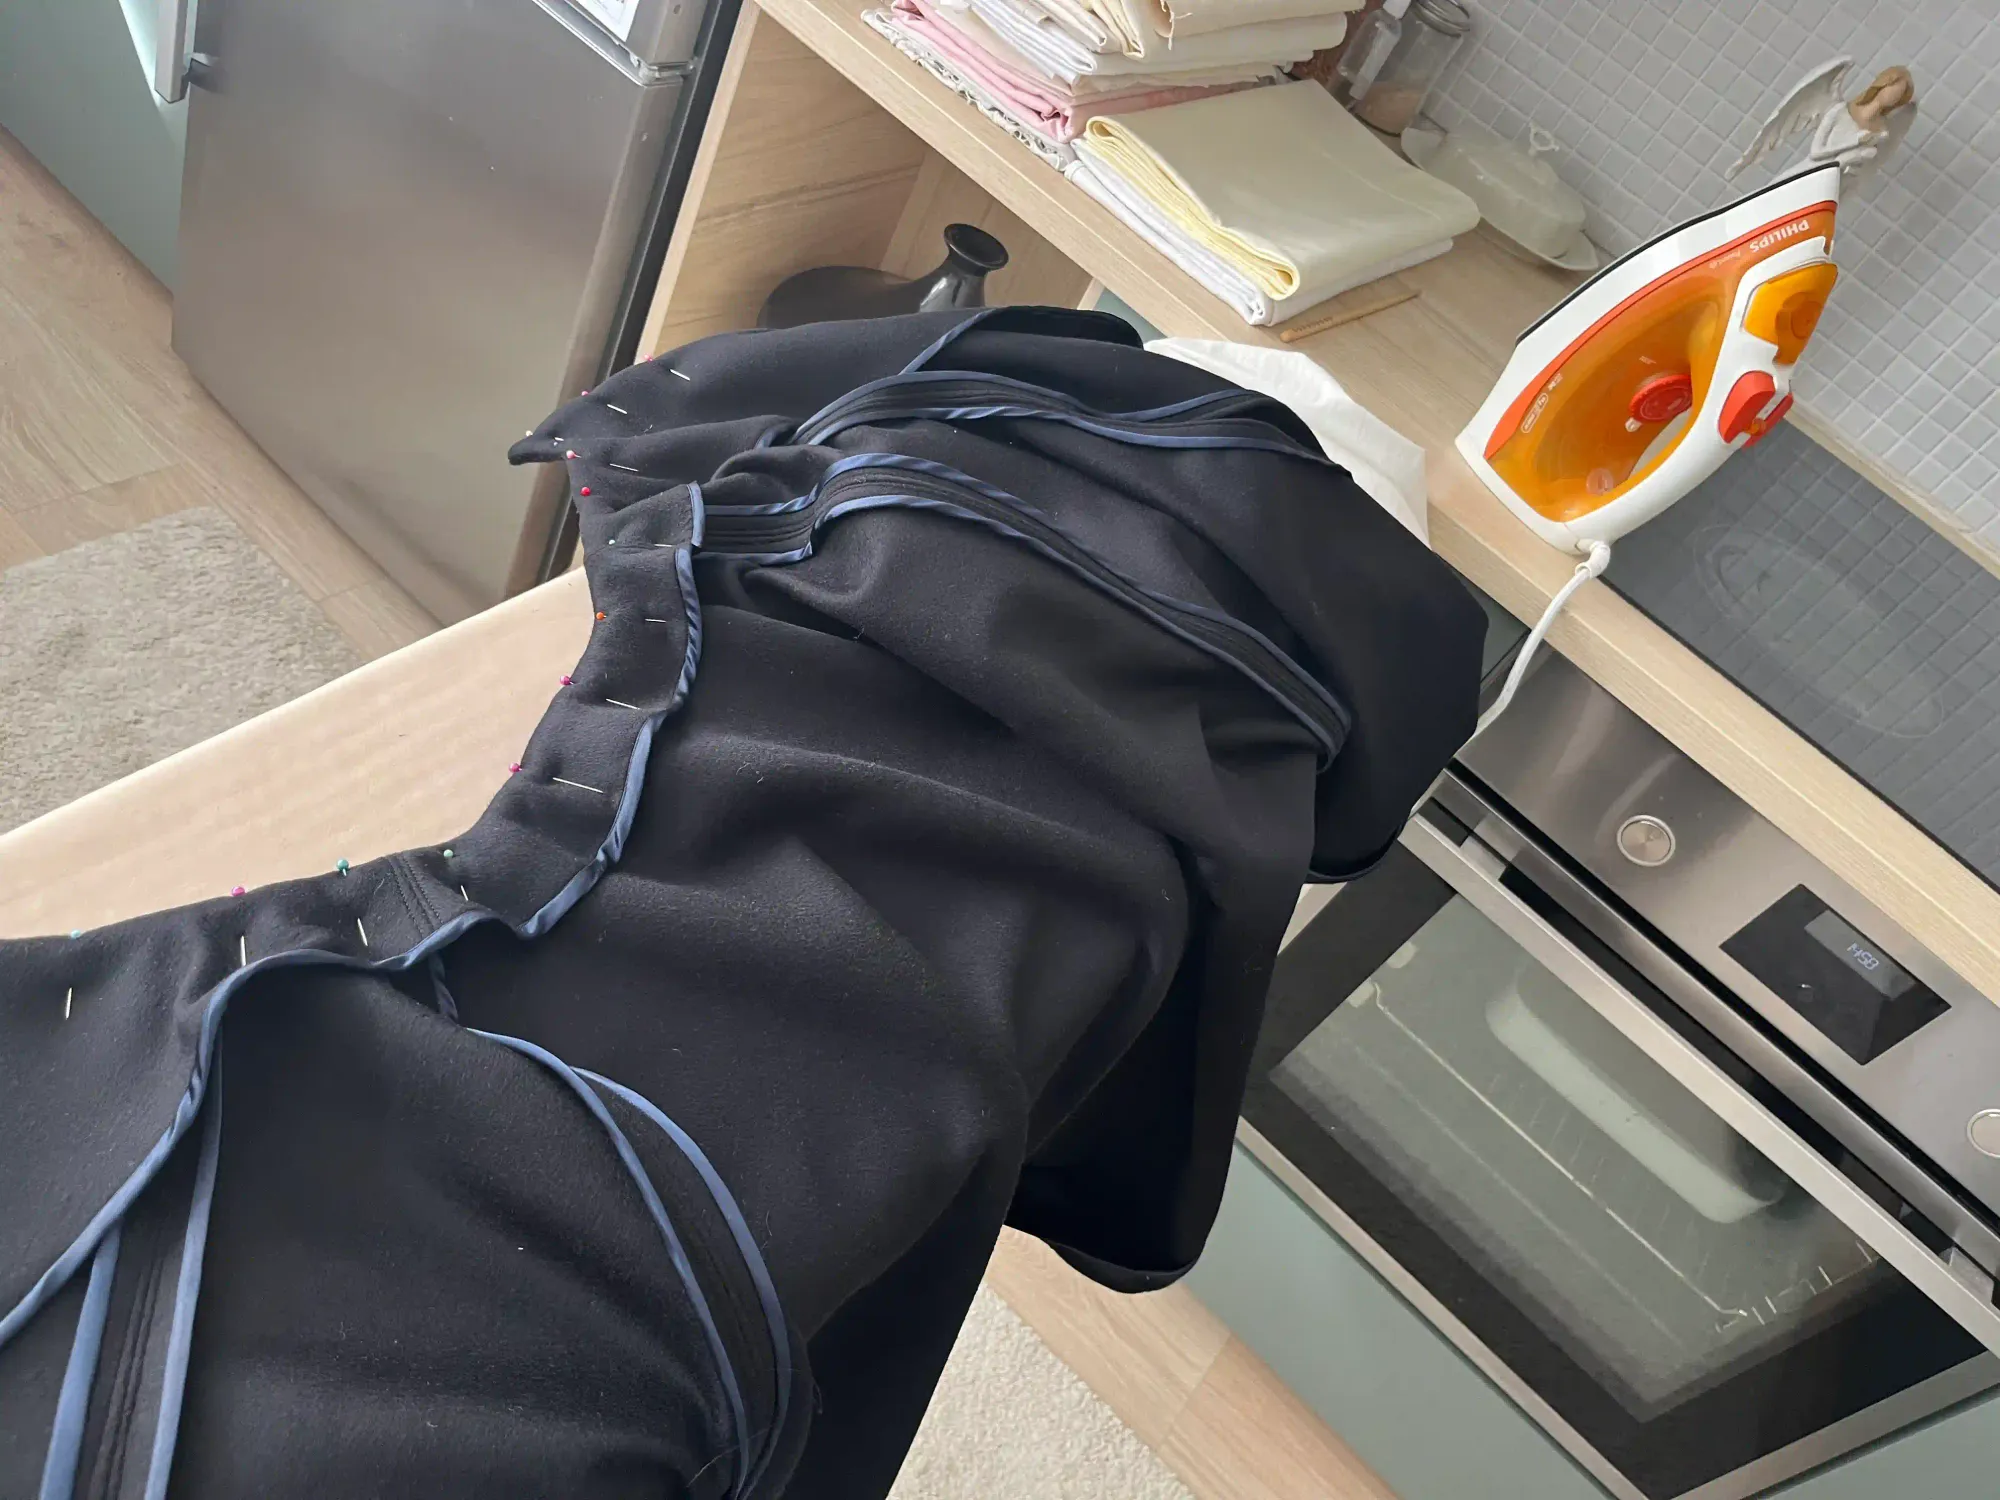
You have reached the final stages of sewing your cape.
Once you have turned the pieces right-side out, pin them firmly together along the entire edge. Stitch along this edge to create a neat, sturdy finish for your new cape. After you finish stitching all the way around, use an invisible stitch on the inside to secure the top (blue) edge to the cape's main fabric. Cashmere, and indeed any coat-weight fabric, is heavier; therefore, you need to use an invisible stitch or add a lining to prevent the inner strip from rolling outward. And that’s it, your cape is complete! Huge congratulations! I would love for you to share the result; feel free to post it in the comments or tag me on my Instagram profile @quietsewing.dana.
Let’s do the math
For this cape, I used 2.5 meters of double-faced cashmere from the brand Loro Piana.
The fabric cost me 339 EUR / 382 USD.
Sewing the cape took 3.5 days of actual work time.
When I checked the Loro Piana website, I discovered that their capes typically retail for around 5,626.25 EUR (6,312.35 USD). My costs (excluding the value of my own labor) amounted to approximately 6% of the final boutique price. I purchased the fabric during a clearance sale; it was the last of that particular type. One piece was a store sample, and the other was the final remnant on the bolt. That's also why I chose to make a cape; the pattern pieces fit within these two separate cuts of fabric. I bought the material in July. The fact that it was from a previous season didn’t bother me at all; these fabrics are so timeless that they will always look beautiful.
This made the fabric affordable for me, and I’m sharing this intentionally to show you how you can source materials and how even the smallest "remnants" can be put to use. Nothing has to be thrown away; everything can be utilized.
So, you don’t need a massive budget. It’s entirely possible without one; you just have to know how to "wait" for the right moment. You’re right, it is, of course, more convenient to just head to a shop in the autumn and buy the fabric. However, not everyone has the budget to afford anything they want, whenever they want. That’s why I wanted to show that this can, too, be a viable path for some of us.
Admittedly, the cape won’t look exactly like an original piece purchased directly from a Loro Piana boutique, but it will be a beautiful creation of your own making. I’m very glad that these fabrics are accessible to ordinary people, that it’s not just an exclusive club for the "top 1%."
After all, for 339 EUR / 382 USD, the most I could get at any typical shopping mall would be a polyester coat. In my case, while it takes time and effort to sew, the result is a cape made from top-tier material.
If you have any questions while sewing, please don’t hesitate to reach out in the comments. I’m here to help! 🫶
Happy Quiet Sewing 🌸
Dana